
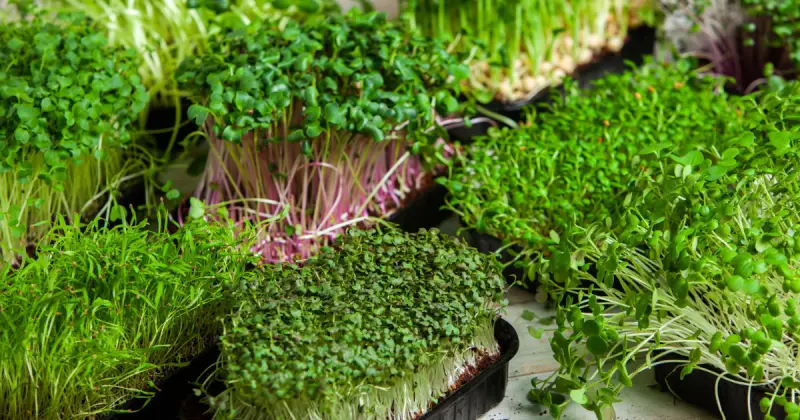
How to grow microgreens at home? That’s the question many growers ask themselves who want to get in on this unique crop that is as tasty as it is versatile. Microgreens are the newest green revolution in vegetable gardening. A powerful superfood, microgreens are incredibly nutrient-dense. They can be grown anywhere, from a sunny windowsill indoors to a small urban balcony outdoors, providing many unique options for the home gardener.
Here are the steps to grow your microgreens:
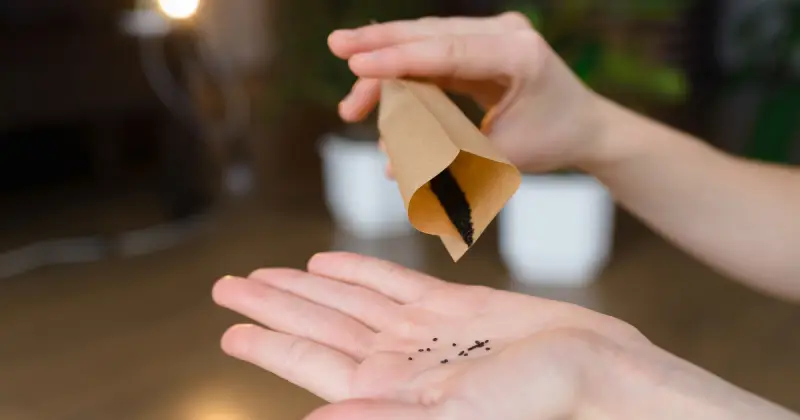
- Soak your seeds for 6 to 8 hours (if required) by following your package directions.
- Prepare your growing tray by evenly setting the growth medium.
- Spread your seeds evenly to avoid clumping.
- Cover seeds and keep them moist with either top or bottom watering methods.
- Place the tray near an open window to allow the seeds to grow.
- Harvest the microgreens once they are ready.
Microgreens are the gardening activity hardly anyone is talking about, yet they should be doing. Micros are easy to grow, harvest quickly, occupy limited space, and taste amazing. So, let’s dive deeper into how easy it is for you, too, to learn how to start growing your microgreen plantation.
Humble Highlights
- Discover the amazing world of microgreens, how easy they are to cultivate, and why you should grow your own at home to reap the excellent benefits of tasty nutrition throughout the year!
- Save money by choosing only the necessary tools and supplies to sow your micros – even if you’re a total beginner – AND discover how to grow these versatile greens with this easy step-by-step plan so you can get started right away.
- Stop guessing how long different microgreens grow with this ultimate quick reference guide that includes 16 of the fastest and tastiest greens from start to finish so you can seize the opportunity and start today.
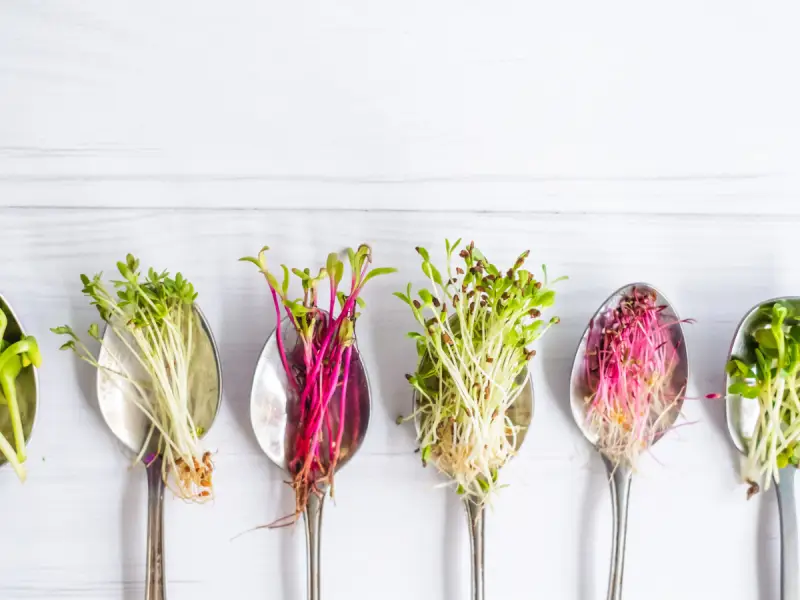
What Are Microgreens
Microgreens are tiny seedlings of full-sized vegetables and flowers. They are more mature than sprouts yet smaller than baby salad greens. These miniature and tender versions of young plants are grown until their first true leaves appear.

Microgreens are aptly named for the first set of leaves these young shoots grow after sprouting from the seed. The initial leaves that appear are called cotyledons or seed leaves. True leaves, on the other hand, extend from the middle of the plant’s stem, differentiating microgreens from sprouts. 1
Once harvested, microgreens become a delightful and delicious addition to many soups, salads, stir-fries, juices, and garnishes, making you the most famous chef in your household.
Why Grow Your Own Microgreens
Microgreens are some of the smallest and simplest plants you can grow. In addition, they don’t take up a lot of space or time, which makes them ideal for people on the go who are serious about growing their food at home.
I am astounded that more people don’t grow microgreens at home. You don’t need experience to grow microgreens, nor do you wait months to harvest. And you will be doing your body a solid because some varieties of microgreens are up to forty times the nutritional content than their mature counterparts. 2
Won’t Involve A Lot Of Supplies
Microgreens don’t involve a ton of equipment like an outdoor garden requires. Instead, you’ll need some simple things like seeds, water, light, pots or trays, and a suitable growing medium.
Can Be Grown Year-Round
Microgreens can be grown indoors or outdoors, but you can harvest them year-round if you choose to grow them inside. Microgreens respond to their environment, so if you’ve made them happy indoors, the weather outside won’t matter.
Less Expensive To Grow Your Own
And, of course, my favorite is that you’ll be saving money! If you’ve ever purchased microgreens at the store, consider alternatives. They are more expensive than gold-plated Italian marble. But, seriously, why waste your hard-earned money when you can grow your own at a fraction of the cost?

Basic Microgreens Supplies
Growing microgreens is a fun and easy process from your kitchen or a dedicated growing space with minimal supplies. You don’t even need experience growing these fresh and tasty greens. So, precisely what equipment do you need to begin? To start growing your microgreens, you need the following things:
- Microgreens seeds
- Plant trays, saucers, or pots
- Growing medium (coco coir or soil)
- Light source
- Watering cup or spray bottle
- Fan
- Plant labels, tags, and notebook
- Scissors, knife, or micro-pruners
- Food-grade hydrogen peroxide
Microgreens Seeds
You will only get so far if you don’t have seeds. I recommend you purchase your microgreen seeds in bulk from a reputable company that knows its stuff and is known for its quality.
Microgreens Trays, Saucers, Or Pots
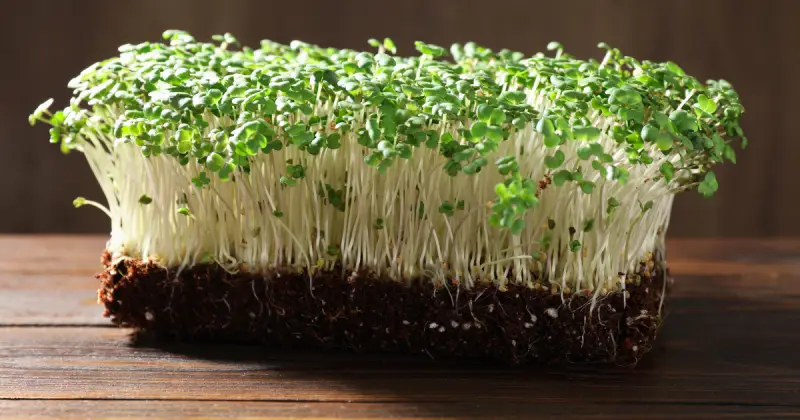
You can grow microgreens in virtually anything, provided it has a relatively shallow depth. Because microgreens are harvested in only a few weeks, extra space for roots is not required to offer a successful yield. 3
However, your microgreens will need excellent drainage. For this reason, growing trays called 1020s (or 10×20) are a common and popular choice. These trays provide a shallow depth of an inch and have plenty of pre-drilled holes for outstanding drainage.
Growing Medium
There is debate about whether soil or coco coir is better for growing microgreens, which comes down to personal preference. I like both, but if I had to lean towards one, it would be coco coir because it provides more control over the process.
Although daily attention may need to be paid to your micros, using coco coir as a soil substitute provides superior aeration to the roots of your plants. So long as you don’t oversaturate your plants when watering, coco coir will retain moisture better, delivering more consistent harvests.
Light Source
Microgreens love a lot of light to flourish. The sun can supply light if you choose to grow your greens outside. Moreover, a sunny windowsill, balcony, or patio provides a great start so long as the area receives ample sunlight for a minimum of six hours.
However, because many people prefer to grow their plants inside, it’s a good idea to have some form of indoor lighting. In addition, you may live in a climate that is not conducive to growing greens outside, or perhaps you plan on growing year-round.

Whether you choose a basic fluorescent, incandescent, or LED light, you have better control over how and when your plants receive light, ultimately creating better yields.
Watering Cup Or Spray Bottle
To help your microgreens grow correctly, you will need to give them water. When watering, your goal should be to wet the medium, not saturate it.
You can water your micros in one of two ways: bottom-watering or top-watering. If you opt for top-watering, a spray bottle is best, as you want to disperse the water on your greens evenly. Top-watering is ideal if you are using regular soil as your growing medium.
Bottom-watering is when you place your 10×20 tray (with holes) into another 10×20 tray without holes. The tiny roots of the micros pop through the bottom holes and come into contact with the water in the tray beneath.
No matter your growing medium, water must be sprayed on top of your seeds for the first few days at least twice daily. After that, bottom-watering will only be needed once the growing phase commences.
When spraying your seeds, ensure you sufficiently cover each corner and side of your tray, pot, or saucer. These areas tend to dry out the fastest, so ensure they remain moist.
Oscillating Fan
Mold, fungal, and rot issues can quickly derail any budding microgreen operation. However, a small fan makes an excellent investment in your plants’ overall health and vitality.
Because microgreens are densely packed, proper airflow is needed to prevent complications. A fan provides ongoing ventilation and circulation that keeps your greens growing.
Plant Labels, Tags, And Notebook
You’ll likely be growing more than one variety of microgreens. Likewise, you’ll want to keep a written record of the different planting phases, such as germination, blackout, and growth stages.
With many things to keep track of, along with different growing requirements for each variety of micro you grow, it’s best to have good organization. Keep careful track of everything so you can continue learning with each new planting.
Scissors, Knife, Or Micro Pruners
Another debate rages on about the proper tool to harvest your young plants. Microgreens are delicate and, therefore, should be cared for accordingly.
Some growers swear by scissors as their go-to harvesting tool. However, use a sharp knife or micro-pruners if you are beginning your micro journey. The reason is that scissors can easily crush the delicate stems of your plants during harvest. Remember, microgreens are less mature than their adult counterparts. So opt for something other than scissors for your first few plantings.
Food Grade Hydrogen Peroxide
If using reusable pots, saucers, and trays, clean and sterilize them thoroughly. Develop a sound system where you routinely wash, rinse, disinfect, and dry your materials.
Regular comprehensive cleanings also help prevent mold or fungus from developing in your new plantings. From personal experience, I encourage you to take this small but essential step seriously. Ensure you take a few minutes and correctly disinfect your tools and surrounding area.
Aside from these above supplies, consider a few additional items for your stores.
The first is plant fertilizer. Again, the debate continues as to whether or not you need fertilizer. Some say the seeds already contain all the plant’s nutrients because microgreens only grow for a few weeks. I am hesitant to agree unless you use an excellent soil mix that includes peat, perlite, and vermiculite. In that case, you do not need any amendments. 4
On the other hand, if you use coco coir, an alternative growing medium previously mentioned with no nutritional benefit, I suggest you use a liquid fertilizer. OceanSolution 2-0-3 is my preferred choice as it is easy to apply via bottom-watering and adds volume to your growing micros.
Next, you can use a warming or heating mat to help speed up germination in colder climates. Still, most seeds are generally tolerant to various environments, so consider this process optional.
Lastly, obtaining a pH meter may be handy because some microgreens do well in acidic conditions. In contrast, others prefer a more alkaline environment. In addition, some microgreens can be picky about their growing environment. Therefore, a pH meter can serve you well if you experiment with several different micro varieties.
How Do You Grow Microgreens (Step-By-Step)
You can grow microgreens in soil, hydroponically, or in coco coir, an inert growing medium. Sufficient drainage and airflow are vital to the overall health of your plants to help keep your greens free from mold and fungal issues. You’ll also need ample light to produce photosynthesis for consistent growth within the plant.
Depending on your growing environment and overall process, committing a few minutes of daily attention to your microgreens is essential for consistently healthy and abundant harvests. Whether a quick spray of water or creating a quick fix for encroaching mold, you’ll need to observe your micros for overall quality until harvest. 5
As mentioned, you can grow your greens in plastic trays, pots, and even jars if you feel inclined. However, for ease of this article, the step-by-step process detailed below will detail the procedure in 10-20 plant trays, which you can buy at any local garden or big-box store. Standard 10-20 trays are so termed due to being 10 inches long and 20 inches wide. However, the measurements of the actual tray are slightly larger.
If you want to start growing microgreens from a soil substitute, like coco coir, I’ve included the video below detailing a step-by-step procedure.
Selecting And Pre-Soaking Your Seeds
Every seed lot you purchase will yield and perform slightly differently. That’s why I suggest you buy microgreen seeds from reputable companies specializing in the practice for the best consistency. In addition, I recommend a company called TrueLeafMarket, which has everything from premium microgreen seeds to entire growing kits if you want to go that route.
Depending upon the size of pot, jar, or tray you decide to use, you’ll need to calculate the correct amount of seeds to cover your growing area. Again, refer to the package label to determine how much seed to use and then measure the appropriate amount.
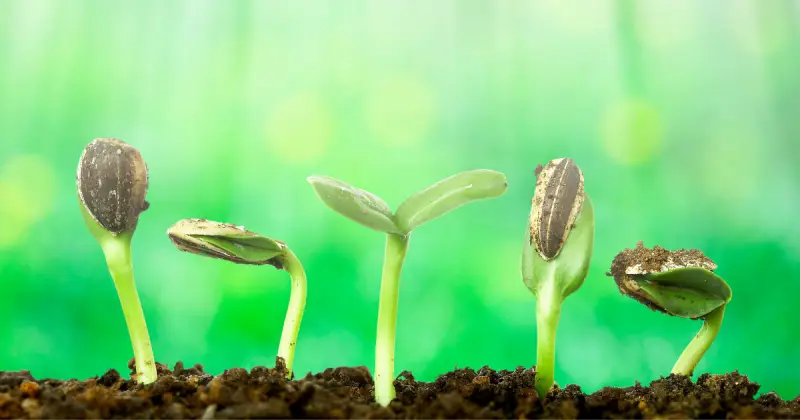
Depending upon the seed varieties you choose, you’ll also need to determine whether your seeds need to be pre-soaked in water and for how long. While some seed varieties don’t need a pre-soak, others require it. Still, other seed varieties like to soak in colder water, so read the seed label before planting.
By pre-soaking your seeds, you are prepping them to germinate quickly in your growing medium while softening the outside seed shell or hull. Once your seeds are ready and the correct pre-soaking time has elapsed, drain the water and seeds through a strainer, removing as much excess water as possible.
It’s also good practice to allow your seeds to dry for an hour or two. By allowing your seeds to dry, you prevent them from sticking together and clumping when you sow them, which you want to avoid.
When drying your micro seeds, I suggest drying them in coffee filters instead of paper towels. As the seeds dry, they won’t stick to the coffee filter but have a bad habit of clinging to the paper towels.
Prepare Your Growing Medium
Because microgreens are young, they demand a growing medium that holds and transfers adequate moisture and air around their tiny roots. You’re also striving to create an environment that’s not too dry or too wet.
Whether it’s soil or coco coir, you’ll want to ensure your growing medium is as level as possible. Fill each tray or pot with about an inch of your medium, making sure to avoid filling to the top.
The main difference between soil and coco coir will be any nutritional additives you include during their growing period. Because microgreens are only growing for a few weeks before harvest, they won’t need much nutrition, like more mature plants would require.
If you opt for soil, look for a premium seed-starting potting mix, which ideally should be soil-less. A general, organic peat-based medium that contains perlite and vermiculite is always a great option.
Coco coir is another good option for growing micros. Coco coir is the fibrous threads between the outer husk of a coconut and the coconut itself. 6
The main benefits of coco coir as a growing medium are its ability to add aeration to your micros’ roots and its amazingly unique ability to hold and retain moisture. Meaning you can fertilize your greens more often and produce fuller harvests.
Coco coir comes either fully expanded or in compressed blocks. If you opt for the compact blocks, which are more cost-effective, you’ll need to add water and expand it yourself. Either way, coco coir will require a bit of extra liquid fertilizer if your aim is consistent and complete yields.
No matter what you’ve chosen for your growing medium, you’ll want to ensure you don’t compact the growing bed. The more compact your growing area is, the slower your seeds will grow. So, instead, aim for a loamy and light soil texture for consistent success.
Sowing Your Microgreens Seeds
Before sowing your seeds, reference the seed label for each microgreens. Each variety determines the required measurements regarding how much you’ll need for your selected growing space. You’ll likely be surprised at how little of an amount you’ll need to cover a full 10×20-inch tray. Remember, a little goes a long way in the micro world.
When applying your seeds, broadcast them evenly over your growing medium. Avoid areas where seeds may clump, as this causes patches of your micros to grow densely in certain areas while restricting needed airflow around the stems. 7
You can always use the old tried and true way by taking your seeds in your fingers and sprinkling them atop your growing medium. However, an easier way to broadcast your seeds is out of a small glass, or an empty salt shaker that’s been rinsed, cleaned, and dried. Holding a glass or shaker provides more control over spreading by ensuring a more even distribution.
If you are using soil as your medium, placing another tray or tamping tool, like a small piece of wood, on top of the soil that gently presses down is good practice. This slight, downward pressure helps the seeds adhere to the soil, creates a flat surface for your seeds to lay, and encourages them to set roots.
To give your seeds a healthy start to their germination, lightly mist them with your spray bottle. Aim for wet, not saturation, when watering your microgreens. Saturation encourages excess moisture, which promotes mold and fungal issues.
Next, depending on the variety of microgreens you are growing, you’ll want to put a bit of weight directly on top of your growing surface. It’s important to know that not all seeds need or grow well with weight on top, but others do markedly better.
The weight you select will be proportional to the growing area you are using and will be dispersed evenly across the surface. You can experiment with different amounts of weight. Still, for standard 10×20 trays, you can use anything from another tray that rests gently on top to a ten-pound paver.
For the microgreens varieties that do better weighted, it’s essential to understand that you are not impeding the seeds’ initial germination. On the contrary, by providing force, you encourage the roots to develop into your growing medium. At the same time, you provide needed friction for your greens to grow upward.
Covering Your Tray For Blackout
Covering and weighing your greens will take several days, depending on the variety of microgreens you are growing. This is because you’ve kept your seeds moist, warm, and away from any light.
Contrary to belief, microgreen seeds do not need light to germinate. What they do require, however, are warmth and moisture. Micros enjoy this dark, warm environment for the first few days after being sown to better prepare for photosynthesis once light is introduced. However, your micros still need to prepare for the light, even during this darkened stage.
You’ll remove the weight from atop the germinating seeds, gently water them, and now you’ll want to transition them into the next growing phase called blackout.
In this blackout phase, you cover your growing area to allow your budding seedlings to stretch before providing light. This “stretching” period effectively elongates the stems from the growing medium, making the plants easier to harvest.
Using 10×20 trays, you can invert a tray atop your growing area for this blackout phase. Again, the variety of micros you’re growing determines the duration of the blackout. For most microgreens, this phase typically lasts only two to three days.
Let There Be Light And Water
As your microgreens have now “stretched” sufficiently, you are ready to provide them with light. Once you remove the cover for good, you’ll generally notice that the first seed leaves that have sprouted, called cotyledons, will likely be yellow.
Upon seeing these yellow leaves, many newer microgreen growers feel they have made a terrible mistake. Fortunately, this is only the case if you see obvious signs of mold. The reason why these seed leaves are yellow is that they have yet to be exposed to light. Once you do, photosynthesis occurs, and over the next day or so, you’ll quickly begin to see these leaves turn to a healthy green.
Again, depending upon the variety of microgreens you are growing, you’ll continue to expose your crop to light, and the more, the better. Most microgreens do best with 16 to 18 hours of light per day, another fundamental reason I advocate for a direct indoor light source.
Remember, when exposing your micros to light, you are creating an environment where the plant will begin to grow its true leaves. True leaves erupt from the middle of the stem itself. Once they emerge, these leaves will be readily discernable from the present seed leaves.
Throughout this growing phase, it’s vital to understand the importance of water. For example, if you are top-watering in soil, evenly spraying your water twice daily is essential, or more if necessary. On the other hand, if you are bottom-watering, now will be the time to add liquid fertilizer to the bottom tray for efficient uptake by the developing root systems peeking through the drainage holes of your growing area.
As mentioned above, I suggest an excellent all-around liquid fertilizer such as OceanSolution 2-0-3. However you choose to water and whatever growing medium you select, always keep your plants wet but not saturated. This watering method is the golden rule for overall microgreen health.
When watering, use filtered water over tap water. Better quality water helps keep your plants healthier and makes them tastier in the long run.
Growing And Harvesting Microgreens
Depending on your microgreens variety, your sprouts will be ready in a few weeks. Several types, like basil and carrots, take a bit longer but still are considerably shorter than their mature counterparts.
A sharp knife is strongly suggested for harvesting your crops. However, using scissors and micro-pruners can also be used. Careful consideration should be given if you choose to use scissors, as the snipping motion tends to crush your micros’ delicate stems. 8
You’ll want to grab the top of your microgreens gently and loosely so as not to damage the foliage. Next, cut the stems about one inch from the growing medium. Never remove the plants with your hands, and trim them away from the growing media afterward. This step may cause unnecessary injury and bruise the stems or leaves themselves.
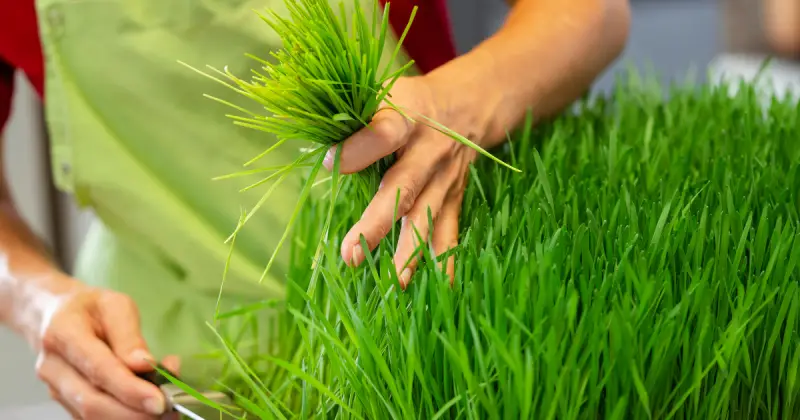
Although scissors can crush the stems of your freshly grown micros, an exception to this rule can be wheatgrass. The cutting motion of the scissors has less chance of destroying your wheatgrass micros. Additionally, wheatgrass is a microgreen that you can cut and come again as it grows for several good harvests. It is a unique variety within the microgreen world that I encourage you to try.
How Long Do Microgreens Take To Grow
The time between seed sowing and harvesting depends on the microgreen variety you cultivate. Generally, microgreens take 2-3 days to germinate and between 1-3 weeks till harvest. Still, referring to the seed label for specific growing instructions and times is essential.
I’ve created the table below to act as a quick reference guide. It includes 16 of the easiest and fastest-growing greens you can grow and their respective harvesting times.
| Microgreens Variety | Average Days To Germinate | Average Days To Harvest |
|---|---|---|
| Arugula | 2-3 days | 5-7 days |
| Broccoli | 3-4 days | 5-7 days |
| Purple Cabbage | 3-5 days | 4-7 days |
| Mustard Greens | 3-4 days | 6-10 days |
| Pea | 3-5 days | 5-7 days |
| Radish | 3-4 days | 6-8 days |
| Turnips | 2-3 days | 7-12 days |
| Salad Mix Greens | 2-4 days | 10-14 days |
| Red Russian Kale | 2-3 days | 8-12 days |
| Purple Kohlrabi | 2-4 days | 7-14 days |
| Collards | 1-2 days | 10-12 days |
| Sunflowers | 2-4 days | 8-14 days |
| Nasturtiums | 4-7 days | 14-16 days |
| Popcorn | 2-3 days | 6-8 days |
| Wheatgrass | 2-3 days | 8-12 days |
| Cucumber | 2-3 days | 8-10 days |
If you are eager to start growing microgreens from soil, I’ve added the video below that will provide an excellent tutorial on the process.
What Is The Best Way To Grow Microgreens
The best way to grow microgreens is to select your growing medium, seeds, and supplies and determine if you are growing your plants indoors or out. Opt for the easiest and fastest-growing microgreens like radishes, peas, and broccoli if you are a first-time grower.
After you’ve gathered your supplies and determined what you will grow, it’s best to start small. Understanding the basics and the process from initial sowing, blackout, lighting, and harvesting will give you an excellent foundation to scale your operation. 9
Ensure you dedicate a small space to your greens if growing them inside. Microgreens don’t take up much room, but it is wise that they won’t be constantly moved around and potentially dropped or disturbed while growing.
Growing microgreens comes down to the preference of the grower. For example, some enjoy a soil-based medium, while others, like myself, swear by coco coir, a soil substitute. Likewise, some growers will love experimenting with different seeds and varieties and adapting to the growing environment accordingly. In contrast, others will enjoy sticking with a few tried and true micros. The choice is yours, of course.
It will likely take several growing periods before you gravitate toward your preferences and what works specifically for you. However, keep sight of the fact that producing your food is fun. Get the entire family involved while exploring an easy and nutritious way to grow microgreens anytime.
When To Harvest Microgreens
Although microgreens can be harvested at any growth stage, the best time is when they are 2-3 inches tall and when you see the stem’s first pair of true leaves. Depending upon the variety of microgreens you are growing, this typically occurs 10-14 days after the initial planting.
Because microgreens are young, they are delicate and tender. As a result, they don’t have the support and strength of their mature equivalent. Therefore, carefully harvest your greens to avoid bruising or crushing the stems and leaves. 10
Sharp, long-bladed scissors or micro-tip pruners should be used for optimal harvesting. Gently grab the foliage with one hand and snip the stems about one inch above the growing medium you use. If you have used soil in your trays and pots, ensure you don’t take up any excess dirt when harvesting.
Except for a few microgreens, like wheatgrass, you won’t be rewarded with additional harvests because you are cutting your crops down to the bottom of the stem. However, because your micros only take a few short weeks to mature, it won’t be long until you harvest your new crop set.
When your microgreens are ready for harvesting, only snip off the ones you are prepared to eat. Mature, harvested microgreens begin to turn bitter after a week. If you cut the entire tray or pot, place the remaining greens in the refrigerator, which should double their shelf-life.
Nutritional And Health Benefits Of Microgreens
Because microgreens have such a short growing cycle, so many nutrients are packed within the plant when harvested. The benefits of growing microgreens are that they contain high levels of vitamins, minerals, and antioxidants that may help prevent heart disease. In addition, when consuming micros regularly, you may reduce the risk of cancer and Alzheimer’s while keeping your digestive system healthy.
High Levels Of Nutrients
The primary benefit of growing your microgreens is the nutrients you can provide for yourself and your family. Microgreens consist of 40% more nutrients than their mature counterparts. Therefore, when you eat microgreens, you consume more nutrients in less time.
Microgreens are rich in the following:
- Antioxidants
- Zinc
- Potassium
- Iron
- Magnesium
- Copper
- Vitamins
- Minerals
Health Benefits Of Microgreens
Microgreens are classified as “functional foods,” meaning they have been studied to carry both health-promoting and disease-preventing characteristics. In addition, these young greens demonstrate a more significant number of concentrated active compounds than their more mature equivalent. 11
Microgreens are famous for their healthy, nutrient-dense composition. As a result, they may offer a wide range of health benefits, such as the following:
- High levels of Vitamin K and additional antioxidants.
- Microgreens may lower blood pressure and prevent heart diseases.
- The dietary fiber content in microgreens supports digestive health and keeps your gut strong and healthy.
- Other benefits of microgreens may include reducing cholesterol and the risk of cancer and Alzheimer’s disease.
Microgreens yield the best nutrients and taste the most flavorful once they sprout their first true leaves from the plant’s stem. In addition, higher amounts of vitamin C and various phytochemicals are found in microgreens when exposed to a greater concentration and duration of light.
The nutritional benefits of wheatgrass, for example, are believed to include lower blood pressure and cholesterol levels, among others. In addition, broccoli microgreens have sulforaphane. Sulforaphane is a micronutrient that is considered to have both anti-cancer and anti-microbial effects.
When you grow and harvest microgreens at home, you preserve all of the plant’s nutrients that would otherwise start to diminish if packaged and shipped elsewhere. These health benefits should help you consider incorporating microgreens into your daily diet and take advantage of everything they offer.
Troubleshooting Disease for Microgreens
Avoiding disease with microgreens comes down to prevention. Preventative action is the best remedy to any ailment or condition you may encounter when growing micros. The more
Keeping your plants healthy and preventing microgreens disease comes down to five key points:
- Seed Spacing And Density
- Humidity And Temperature
- Airflow
- Sanitization
- Growing Medium Management
Seed Spacing And Density
Damping off, a fungal infection prevalent in young seedlings, is a concern with microgreens. Damping off occurs in areas that are in excessively moist environments. Because micros aren’t provided any pesticides due to their brief growing cycles, ensuring you don’t overseed in an already dense-growing area is essential. When measuring the appropriate seeds for your tray or pot size, adhere to the instructions on the seed label.
It’s also important to note that bottom-watering can further prevent fungal issues. By keeping the bottom of the stems relatively dry atop the growing medium, you are essentially providing a much healthier environment.
Airflow
Microgreens love fresh air. In fact, moving, ventilated air is vital to the health and vitality of your crops. Grow lights and moisture released from the plants themselves, a process called transpiration, add to the humidity, which is why good ventilation is necessary.
We’ll look into the temperature and humidity below, but for now, controlling these two variables ensures air circulates around and through your microgreens. For this reason, purchasing a small, oscillating fan is advisable. Oscillating fans simulate natural airflow like you would expect to feel outside. However, you want to ensure you don’t point the fan directly at your microgreens to avoid windburn.
Suppose you are growing microgreens more substantially and have an entire room dedicated to the practice. Aside from investing in a fan, you may opt for an extractor fan and a dehumidifier.
A fan extractor pushes stale air out while pulling fresh air into the area and is the same system as those found in kitchens and bathrooms. A dehumidifier helps control the humidity within the growing space, which, in turn, will help keep your greens from wilting.
The bottom line is that there is a greater likelihood that mold will form around and on your microgreens if you have zero airflow. So, even opening a window and allowing a fresh breeze to grace your micros is better than nothing.
Humidity And Temperature
As mentioned above, damping-off occurs primarily in wet and warm conditions, the same environment your seeds need to germinate.
Generally speaking, microgreens need a consistent temperature above 70 degrees F to thrive consistently. However, different micro varieties can tolerate cooler temperatures, and it’s best to keep the temperature range from 75 to 85 degrees F.
If growing microgreens outdoors, you should pay more attention to the temperature to ensure your greens stay within the above temperature parameters. When developing your greens indoors, you’ll have much better control over the climate. Additionally, there will be less chance of mold or disease developing.
Sanitation
Seed quality plays a vital role in your microgreens’ overall health. We’ve already discussed purchasing quality seeds from a reputable company. However, even good-quality seeds can harbor or develop mildew, and it’s for that reason that seed sterilization is essential. 12
An effective fix is to soak the seeds in undiluted store-bought vinegar for 15 minutes and then lightly rinse with water afterward. This article from The University of Kansas Extension reviews seed safety and sterilization from their research.
The initial germination process can be confusing when growing microgreens, particularly for new growers. As soon as sown seeds begin to sprout, little white root hairs start forming around them, which is part of the natural process. However, mold, prevalent in microgreen trays, looks the same – and that’s the problem. Because this can be an easy step to overlook, check out the informative video below that will help set you straight!
Keep up to date on sanitizing your microgreen trays, pots, and other tools that contribute to your growing process. A good wash with soap and water followed by a spray of store-bought 3% hydrogen peroxide is an excellent hygiene routine to keep your areas clean.
Growing Medium And Management
Whether growing your micros in soil or another soil substitute, like coco coir, the healthy maintenance of your growing medium is necessary for the success of your plants.
Although some varieties of microgreens are more vulnerable to disease, you’ll generally see less if you grow your greens in a coco coir. Using a soil substitute is one of the main reasons I love growing with coco coir, but again, other micro growers swear by soil.
Whatever growing medium you choose, if you encounter mold, lightly mist a 3% hydrogen peroxide solution or white vinegar over the affected area. However, a word of caution here. Too much hydrogen peroxide or vinegar applied to your greens can burn the plant, so be conservative and go from there.
White fuzz surrounding your young seedlings is often mistaken for mold, especially by beginners. Remember, as the video above explains, white fuzz develops in germinating seeds and is a natural part of growth.
White fuzz (aka root hairs) is light, looks spiky, encircles the roots, and disappears when watered. In contrast, mold surrounds the actual seeds, can cover bare soil, looks fuller, and is slimy to the touch. Additionally, you can distinguish between the two by noting if the fuzz is growing up the stem. If it is, there is a greater likelihood that it is mold.
Conclusion
Growing microgreens at home is achievable, even if you have never heard of them. That makes the entire topic of microgreens so exciting and is why I say it is the one food everyone should be growing. Now that you have heard about the nutritional power of microgreens, you can start growing them with minimal investment year-round.
Start small, with a few pots or two or three 10×20 trays and the easiest and fastest-growing greens. Experiment with different varieties and flavors once you get a basic grasp of the process. After that, the sky will be the limit for what you can accomplish right in your kitchen.
Have you started growing microgreens? We’d love to hear about the selections you’ve successfully cultivated. Drop us a line below in the comments and join the conversation!
SOURCES
- Wikipedia – Microgreen
- ACS Publications – The Science Behind Microgreens As An Exciting New Food For The 21st Century
- Iowa State University, Extension And Outreach – How To Grow Your Own Microgreens
- Mississippi State University, Extension – Grow Microgreens Inside For Fresh Winter Produce
- University Of Illinois Urbana-Champaign, College Of Agricultural, Consumer & Environmental Sciences – Small, But Mighty Microgreens Are Easy To Grow Indoors
- Wikipedia – Coir
- ScienceDirect – Microgreen: A Tiny Plant With Superfood Potential
- Cambridge University – Environmental Factors Influencing The Growth And Pathogenicity Of Microgreens Bound For The Market: A Review
- University Of Florida, Gardening Solutions – Microgreens
- Oregon State University – Microgreens In Your Classroom
- Idaho State University – Nutritional Profile Of A Few Types Of Microgreens
- World Economic Forum – Trendy Microgreens Could Help Feed The World
