
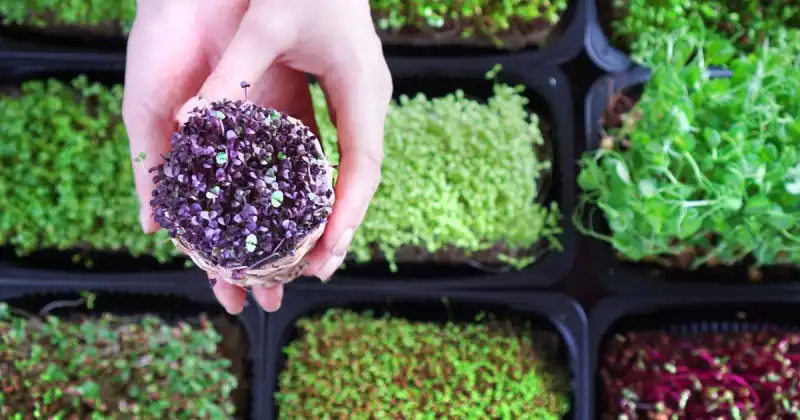
Hold on to your gardening gloves because growing microgreens is not only nutritious but can also be a lot of fun! Imagine choosing from a vast array of seed options, prepping your trays, and watching these tiny plants grow before your eyes. They can be a nutritional powerhouse grown indoors or out. Even better, you don’t need a green thumb or ample space to start, just a few simple tools and a desire to grow.
Outdoor microgreens can be grown for great taste and higher nutrition with fewer expenses. Needed tools include a watertight tray, tubemate, seed pack, dome, and spray bottle. You’ll also want to control outdoor pests and mold within your growing media while maintaining an ideal temperature of 75°F and a humidity of around 55% for optimal growing.
If you are looking for a fun and easy way to boost your nutrition while involving the whole family, microgreens may be the answer. With my expert tips and guidance, you will have the confidence to take your microgreens from seed to plate in no time.
Say goodbye to pesky pests and mold, and hello to fresh and delicious microgreens you can enjoy in your salads, sandwiches, and smoothies. So let’s get our hands dirty and start growing these little plant powerhouses in your backyard!
Humble Highlights
- Discover the pros and cons of growing microgreens indoors and outdoors to determine which method is best for you, and start growing your nutritious greens immediately!
- Save money by knowing the 6 microgreen varieties that thrive outdoors so you can stop guessing and start growing.
- Save time by understanding how growing your micros outdoors can simplify your gardening routine while learning the six indispensable methods to help you produce a better crop and a better return for your buck.
Microgreens And Their Incredible Potential For Nutrition And Flavor
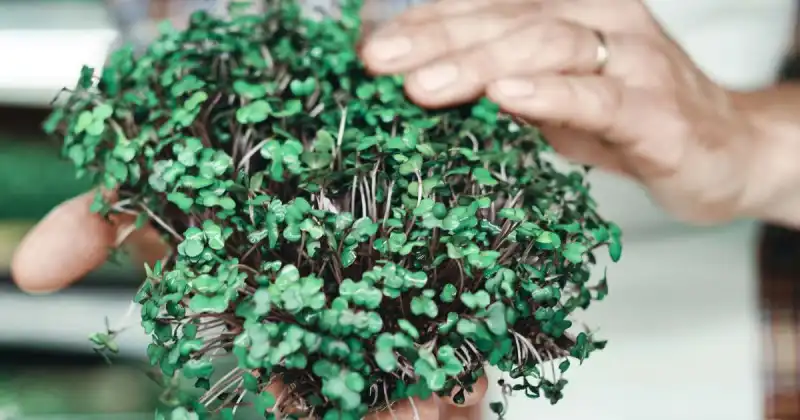
Microgreens are small, young plants harvested after just a few weeks of growth, typically when the first true leaves have developed. Microgreens are often used as a garnish or incorporated within salads, soups, smoothies, and sandwiches and can be successfully grown indoors and out.
As more and more restaurants feature microgreens in their dishes, more people than ever realize just how delicious and nutritious these tiny greens genuinely are. In fact, these tasty greens can be grown from seeds with minimal space requirements.
Check Lowest Prices On Microgreen Books Now
Micros consist of the young seedlings of popular, albeit more miniature, vegetable plants such as cabbages, mustard, radishes, beets, and others. Although these tiny plants germinate from the same seeds you’d plant in the backyard garden, they are grown for only a fraction of the time than their mature counterparts. Therefore, they are harvested shortly after germinating for maximum flavor and nutrition.

And while these tiny plants may be small, usually only between one and three inches tall, they pack a powerful punch of nutrients, with some having a much more intense flavor than their adult equivalents.
When growing microgreens, you only have to wait one to two weeks after they begin germinating to harvest them, making their growth cycle extremely short. Plus, they are super tender compared to full-sized greens, making them perfect for various dishes. That’s why increasingly innovative restaurants feature microgreens in their appetizers, sandwiches, and salads and, indeed, throughout their menu. 1
Pros And Cons In Growing Microgreens Indoors vs. Outdoors
As you might expect, there are pros and cons when growing microgreens indoors and out. While indoor growing may take up more space, it can be a smoother operation as the grower has more control over the amount of light and moisture their greens receive and doesn’t need to worry about unpredictable weather patterns. Conversely, outdoor microgreen gardeners may need to deal more directly with pests and disease, yet growing your plants outside provides your plants with plenty of natural light.
Indoor Microgreens Garden
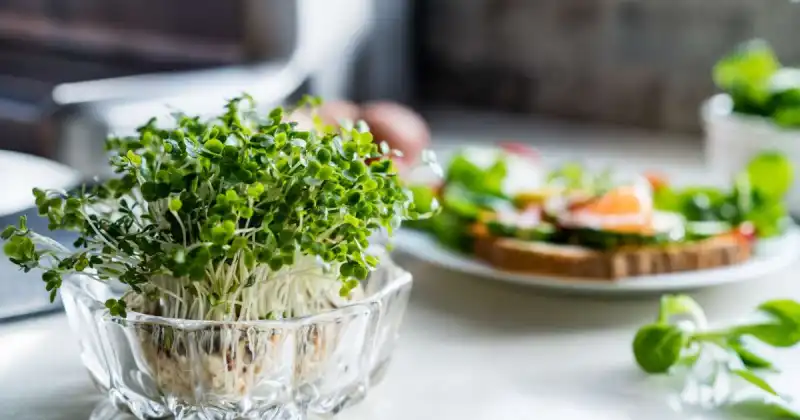
One of the best advantages of growing microgreens indoors is that when you use soil as your growing media, you may lessen the chances of disease if your containers provide proper drainage. In addition, when using a fresh potting mix, soil-grown microgreens have a reduced risk of contamination from E.coli, salmonella, and other contaminants.
Finally, microgreens grown in soil are easy to develop. Although daily attention should be paid, you won’t need to spend hours maintaining your crop like in a typical backyard garden. Daily watering, for example, might be a requirement until your greens are ready to be harvested, depending upon the saturation of your growing media. Remember, when growing micros, aim for a moist environment, like a wet sponge, not a saturated one that may promote disease and mold. 2
Check Lowest Prices On Microgreen Lights Now
However, indoor microgreens may require more space, such as using seed flats, and unless you have a dedicated growing area, they can take up a fair amount of room. Likewise, indoor growers may also need to use grow lights as the amount of light received inside may need to increase for proper microgreen growth.
Outdoor Microgreens Garden
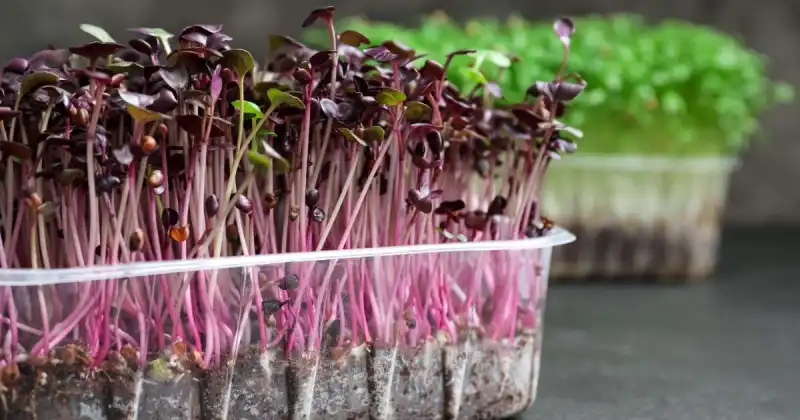
Like indoor growing, cultivating microgreens outdoors also has pros and cons. For example, natural sunlight provides your green plants with a substantial amount of photosynthetically active radiation (PAR), which is essential for plant growth. Additionally, like micros grown indoors, microgreens grown outdoors can grow to have unique colors and flavors, such as beautiful purple stems. Further, they may be spicier and more flavorful than indoor-grown microgreens.
Check Lowest Prices On Microgreen Trays Now
However, microgreens grown outside are more exposed to Mother Nature and, may be more susceptible to pests and diseases. In addition, unforeseeable weather patterns and conditions, like heavy rain or prolonged periods of extreme heat, may also impact your plants’ growth, especially if you live in a region susceptible to these conditions.
Best Microgreen Varieties To Grow Outside
Although gardeners can grow many types of microgreens outdoors, there are several famous varieties growers enjoy cultivating, including:
- Radish
- Wheatgrass
- Cabbage
- Pea Shoots
- Corn
- Sunflower Seeds
Although you can grow microgreens indoors or out, certain micro varieties enjoy and even thrive in outdoor settings. And although some microgreens are indeed relatively easy to grow indoors, a wide variety tends to flourish when grown in outdoor environments. So let’s examine these selections and discover why these six microgreen stapes are a hit with new and seasoned micro growers alike.
Radishes For Spicy Crunch
Radish microgreens are an excellent option for those who want to add a spicy kick to their meals. These sassy microgreens have a bold, peppery flavor that can help add depth to your palette. In addition to their unique taste, radish microgreens are also incredibly easy to grow, making them a popular choice among growers.
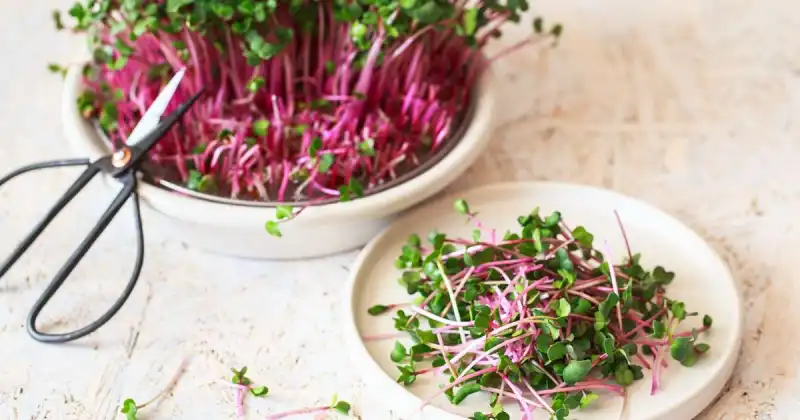
When cultivated outdoors, radish microgreens thrive in cool temperatures, making them perfect for fall and spring gardening. As they develop, their bright green leaves and pinkish stems add a pop of color to any garden and, ultimately, any dish.
Check Lowest Prices For Radish Microgreen Seeds Now
Radish microgreens are packed with essential nutrients, including vitamins A, B, C, and K, and calcium, iron, and magnesium, making them a true nutritional powerhouse. In addition, they are an excellent source of antioxidants, which may help protect against disease and support overall health.
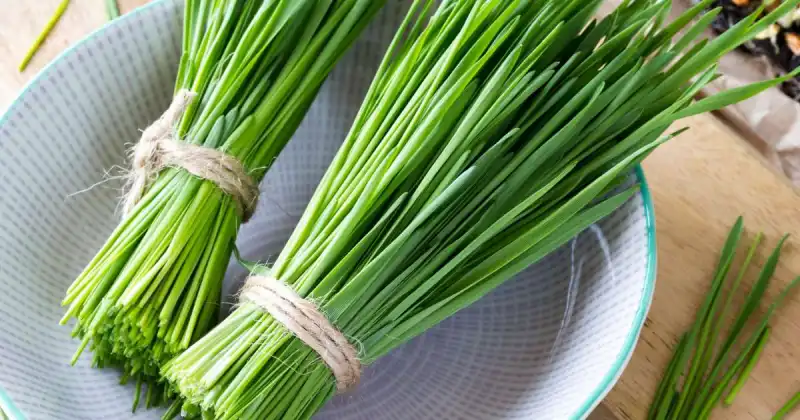
Wheatgrass, The Cool Kid Of Microgreens
Wheatgrass is a popular microgreen that grows well outdoors, particularly during winter and spring. And while wheatgrass can be grown indoors, outdoor growing provides a few distinct advantages.
Firstly, outdoor environments typically offer more natural light and fresh air, crucial for wheatgrass growth. Additionally, outdoor temperatures and humidity levels are often more conducive to wheatgrass growth, making it easier to maintain these ideal conditions. 3

Hard red winter wheat is often recommended when selecting a wheatgrass variety for microgreen production. This type of wheat has a slightly reddish tint to the kernels and is known for its high nutrient content.
Hard red spring wheat is another good option similar to the winter variety in growth and nutrient profile. Overall, growing wheatgrass outdoors as a microgreen provides a cost-effective and nutrient-rich opportunity for juicing and other health-based practices.
Napa Cabbage For Concentrated Goodness
Napa cabbage is an excellent option for those looking to grow microgreens outdoors. This variety of cabbage is easy to cultivate and proliferates quickly, allowing you to enjoy your harvest in short order. Not only does it provide a delicious flavor to your dishes, but napa cabbage also adds a beautiful appearance that can enhance the visual appeal of your meals.
Additionally, in my opinion, napa cabbage is better grown as microgreens than the mature variety because the nutrient content of the plant is concentrated in the young, tender leaves of the microgreens. Therefore, you can get a more concentrated dose of the plant’s vitamins and minerals by consuming napa cabbage as microgreens.
When growing napa cabbage, it’s crucial to be mindful of the climate, as this plant prefers a slightly cooler environment to flourish. Two good times to plant this crop outside are early spring and fall when temperatures are milder. And just like all microgreens, the soil should be kept wet and moist but not overwatered to create any pooling water that may spawn mold.
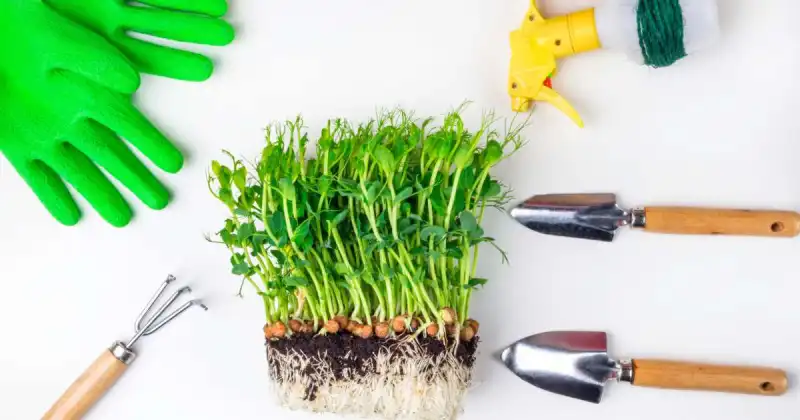
Pea Shoots
Pea shoots are a highly versatile and wildly popular microgreen that can add a fresh, earthy flavor to a wide range of dishes. In addition, these small and tender shoots are packed with nutrients such as vitamins A, C, and K, making them a healthy addition to juices, smoothies, tacos, burgers, or virtually any meal.
Not only are they delicious and nutritious, but pea shoots are also incredibly easy to grow. These plants tend to germinate quickly and provide high yields from their dense leafy canopy, making them a cost-effective and convenient option for any gardener.
Check Lowest Prices On Microgreen Pea Seeds Now
However, mold is one thing to watch out for when growing pea shoots and microgreens in general. The moist and warm growing conditions microgreens enjoy are also ideal for mold if not properly managed. To avoid this issue, ensure proper drainage and airflow in your growing containers while preventing overwatering and overseeding. Additionally, always use high-quality seeds and clean growing mediums, whether it’s soil, coco coir, or another alternative, to minimize the risk of mold growth.
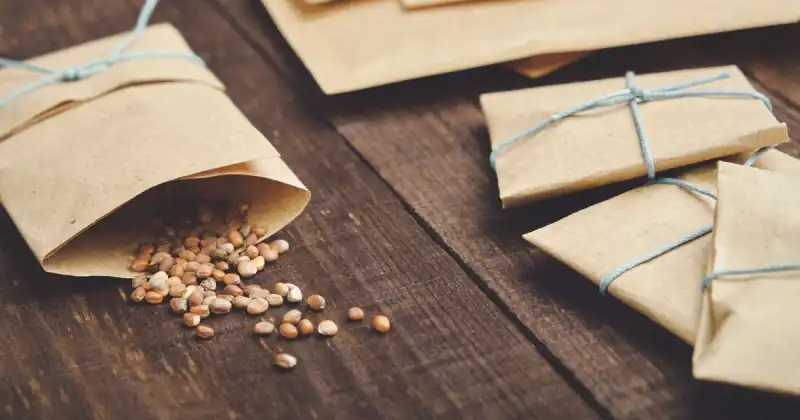
Seed sanitization also plays a crucial role in reducing mold growth when first sowing them. Even though you’ve purchased your seeds from a quality source, mold spores can still lie dormant on the hulls or outer surface of the seed and may begin to grow once placed in your growing media when provided moisture.
Although commercial options are available, I prefer more natural ways to sanitize my seeds, including food-grade hydrogen peroxide and vinegar. Depending upon the size of your microgreen tray, the amount of each diluted in water will vary when applied.
Check Lowest Prices For 3% Food Grade Hydrogen Peroxide Now
Here’s an excellent video explaining all about seed sanitization for microgreens. Remember, prevention is the best way to lessen the chance of microgreen mold. And even if you’re beginning your microgreen journey, knowing how to soak and sanitize your seeds can help save you tons of time and money while avoiding unnecessary frustration.
A Tiny Twist On Classic Corn
While corn is commonly grown as a large outdoor crop, it can also be cultivated as microgreens. Corn microgreens offer a unique, delicious, sweet, and slightly earthy flavor. These tiny plants can be added to various dishes, from salads and sandwiches to stir-fries and soups, while offering a fresh and vibrant taste.
In addition to their unique flavor, corn microgreens are rich in essential vitamins, antioxidants, and minerals. They are a great source of vitamins C and E and antioxidants that can help protect against disease and support overall health. And, because they are harvested early in their growth cycle, they are more tender and easier to digest than mature corn.
Check Lowest Prices For Potting Soil Now
When growing corn microgreens, it is vital to use nutrient-rich soil and provide adequate moisture to ensure proper growth. These plants are also sensitive to high temperatures and humidity, so growing them in a cooler environment is best.
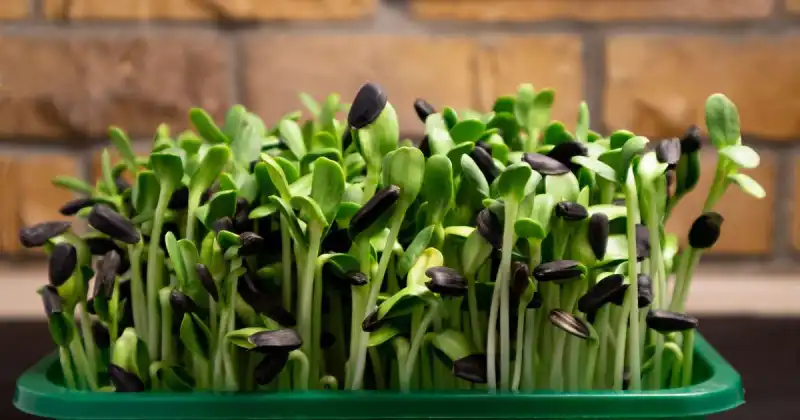
The Mighty Sunflower Seed
Sunflower microgreens are an excellent choice for those looking to grow microgreens outdoors. These small shoots contain nutrients, including protein, fiber, and various vitamins and minerals. They also offer a mild and slightly nutty flavor that pairs well with many different dishes, making them a versatile addition to any meal. And, with their bright green color, they add a pop of visual appeal.
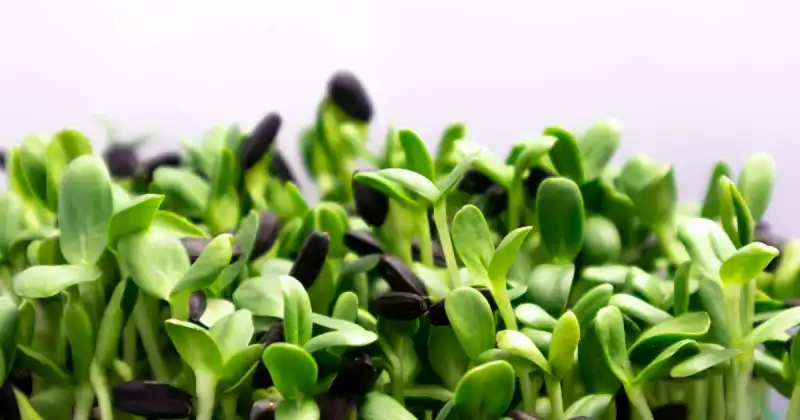
When growing sunflower microgreens, it is crucial to choose the right seeds. For example, black oil sunflower seeds are a great option, as they have a high germination rate and are less prone to molding than striped seeds. In addition, providing adequate moisture and proper drainage in the growing medium is crucial to ensure successful and even growth.
Check Lowest Prices On Sunflower Microgreen Seeds Now
Sunflower micros are now considered a delicacy thanks partly to Viktoras Kulvinskas, the co-founder of the Hippocrates Health Institute, who first introduced the idea of growing and consuming these greens. Due to their unique flavor and texture, sunflower microgreens require special attention when growing. They thrive in cooler temperatures, and their growing media should be moist but not overwatered to avoid mold.
Sunlight And Savings: Why Outdoor Microgreen Growing Is A Game Changer
Growing microgreens outdoors has several advantages and benefits, including:
- Reduced Equipment Requirements
- More Cost-Effective
- Simplifies Your Gardening Routine
Let’s look at these three main opportunities and see why outside growing may suit you and your greens.
Reduced Equipment Requirements For Microgreen Growing Outdoors
One of the most significant benefits of growing microgreens outdoors is that you need less equipment. When growing microgreens indoors, you need to grow lights, trays, growing media (soil, coco coir, grow mat), a dehumidifier, a fan, and other equipment to provide the ideal growing conditions for your micros.
However, when growing microgreens outdoors, you can rely on natural sunlight and the natural outdoor environment to provide the necessary conditions for their growth. This can help you save on equipment and electricity costs while making it easier to start growing microgreens in a much more practical and easy way. 4
More Cost-Effective Option
Another benefit of growing microgreens outdoors is that it can be less expensive. When growing microgreens indoors, you need to pay for the electricity used to power the grow lights, fans, and any ventilation, as well as the cost of the trays, growing medium, and other equipment you may have.
However, when growing microgreens outdoors, you can rely on natural sunlight, which Mother Nature freely provides. Further, you can use recycled materials like old containers or garden soil to plant your microgreens, making it an even more affordable option.
Simplifies Your Gardening Routine
Growing microgreens indoors requires regular cleaning and sanitizing of the equipment to prevent the growth of bacteria and fungi that can harm the plants.
When growing microgreens outdoors, however, you don’t need to worry as much about sanitation. While sanitation is still essential to the health of your plants, the outdoor environment provides natural air circulation. As a result, it helps to prevent the buildup of moisture that can lead to the growth of harmful microorganisms. And this means there is less cleaning and less need for chemicals or disinfectants, making it a more environmentally friendly option.
Best Method For Growing Microgreens
The best method for growing microgreens outside involves a few easy-to-follow steps and a quick implementation strategy. The five main components are:
- Choosing What Kinds Of Microgreens You Want To Grow
- Get The Proper Tools
- Watch Out For Garden Pests
- Be Alert For Microgreens Mold
- Best Temperature And Humidity For Outdoor Microgreens
Let’s review these crucial steps to get your microgreens up and growing outside in no time with minimal hassles.
Choose What Kinds Of Microgreens You Want To Grow
Once you’ve decided where to grow your microgreens, the next step is to choose the kinds of microgreens you want to cultivate. Choosing from the various types of microgreens can be a fun and exciting process, as so many options are available!
Check Lowest Prices On Microgreen Seeds Now
You can start by thinking about your personal preferences. For example, do you love the crunch of radish or the sweetness of corn? Or maybe you’re a fan of the nutty flavor of sunflower microgreens or the nutritional punch wheatgrass offers. Then, whatever you decide, get the whole family involved and take note of everyone’s favorites.
But it’s not just about taste. You can also consider the nutritional value of each variety. For example, studies of microgreens have shown that they can contain significantly more nutrients, per gram, than their fully grown counterparts, with some species containing higher levels of iron, vitamins E, A., and C, along with carotenoids. In addition, microgreens can pack all the benefits of a mature plant into a highly concentrated and easily digestible form. 5
Get The Proper Tools
Growing microgreens successfully means it’s vital to have the proper tools. As mentioned above, producing microgreens outdoors require fewer tools than indoor methods. Depending on your chosen technique, you may need a watertight tray, tube mat, seed pack, dome, and spray bottle.
Check Lowest Prices For Microgreens Dehumidifiers Now
If you’re not growing your greens in a raised bed, a watertight tray is necessary to keep the growing medium in place and prevent water leaks that could damage your plants. A tube mat is also essential as it provides the foundation for your seeds to grow.
The seed pack will provide all the necessary information on the species you choose, such as the amount needed per tray, ideal temperature, humidity levels, and the time it takes for the seeds to germinate. A dome may also be required to create the perfect environment for germination as it helps to retain moisture and heat, which are critical in the early stages of growth.
Check Lowest Prices On Microgreen Starter Kits Now
Lastly, the spray bottle ensures your microgreens get the right amount of water without disrupting the seed placement and makes it easier to water your plants as they begin to grow. Consider gently misting your tiny seedlings from the top to avoid disturbing the soil. These tools will help ensure your microgreens have the right environment to grow and thrive.
Check Lowest Prices On Spray Bottles Now
Top and bottom watering are the two primary methods for watering microgreens; their practices are just as the name implies. Top watering is when you water (mist) your greens from above. Conversely, bottom watering is a technique where your greens are watered from below, as moisture is held between two trays or containers and wicked upwards through the roots and growing media.
Fortunately, you can provide your greens with these two options when growing outdoors. However, if growing your seeds in raised garden beds, you’ll only be able to provide top watering. Whatever way you water your micros, remember, you are striving for a moist media, not a saturated one.
To prevent mold, you’ll want to ensure any pockets of pooling or standing water, and that’s why I suggest you have a well-draining bed, like a raised one, to lessen the chances of stagnant water and to keep your delicate plants healthy.
Watch Out For Garden Pests
One potential challenge of growing microgreens outside is dealing with garden pests. These pests can damage or even destroy your fragile microgreens if left unchecked. Therefore, you may need to take proactive steps to prevent or mitigate pest infestations, such as using natural pest control methods, or even consider growing your microgreens indoors or in a greenhouse if your outdoor growing area is susceptible.
Be Alert For Microgreens Mold
Another potential issue with growing microgreens is the development of mold. As previously mentioned, the proliferation of mold can occur if the microgreens become and remain overly moist or not adequately drained or ventilated. Therefore, monitor your microgreens regularly to ensure they’re not developing mold and take the proper steps to prevent it from occurring.
Best Temperature And Humidity For Outdoor Microgreens
Finally, outdoor microgreens’ best temperature and humidity will depend on your seed-growing varieties. In general, microgreens flourish in warm temperatures between 60 and 75 degrees Fahrenheit and humidity levels between 50 and 60 percent. Keeping your microgreens in an environment that meets these conditions can help ensure their continued success.
Outdoor Microgreens: Growing Tips And Techniques
Like anything in the garden, growing microgreens outside has advantages and disadvantages. These six crucial techniques will help increase your chances of an abundant crop.
- Pick The Perfect Outdoor Spot
- Prepare Your Garden Bed And Soil – Or Outdoor Containers
- Sow And Cover Your Seeds
- Water Properly
- Harvest Your Microgreens
- Restore The Soil For Your Next Batch

Let’s dive into these processes more deeply to help you start on the right leaf!
Picking The Perfect Spot
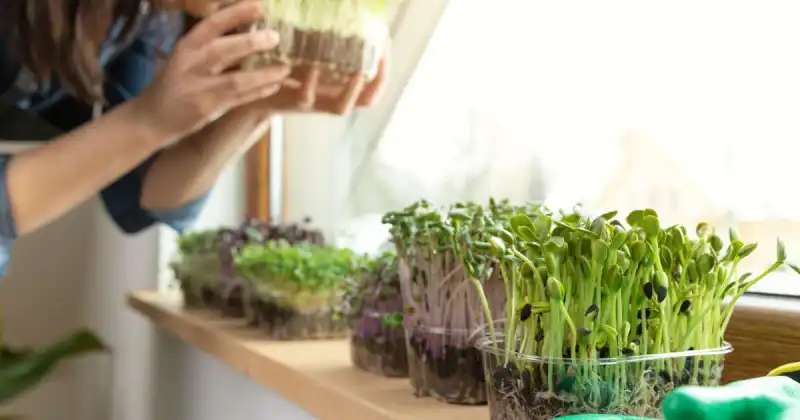
If you want your microgreens to prosper, choose the ideal location. The key to growing healthy and vibrant microgreens is to provide them with the right amount of sunlight. Your microgreens will thrive by selecting a spot with plenty of natural light.
Like all plants in the garden, microgreens need light to grow, and the sun is the most natural light source. Therefore, when you plant your microgreens outside, you can take full advantage of the sun’s energy.
Direct sunlight exposure is excellent for microgreen growth, but your delicate plants and their media must not dry out. Therefore, consider checking your greens several times daily in an arid climate. Likewise, if you live in a hotter region, consider providing some necessary shade to provide your tiny plants some welcome relief. 6
Select a spot not overshadowed by tall plants or trees to ensure that your microgreens receive adequate light. Remember that different microgreen varieties have varying sunlight requirements, so ensure you understand what your chosen plant needs and the proper light it should receive.
Nothing is more damaging to your micros than dry and hot conditions. Not only does this dangerous climate stunt the growth of your greens, but you’ll likely receive spotty or patchy growth across your container or garden bed, as some seeds will germinate while others will not.
Therefore, consider growing your greens in a greenhouse, sunroom, or windowsill that receives ample light and provides good air circulation and ventilation. Of course, you’ll also want to maintain proper humidity and a moist growing media, but these can be additional options if outdoor circumstances aren’t viable for delicate microgreen growth.
Prepare Your Garden Bed And Soil – Or Outdoor Containers
After you have chosen the ideal location, the next step is to prepare your garden bed and soil. You can invest in a pre-made soil mix or make your own using a combination of peat moss, vermiculite, and perlite.
Ensuring that your soil is loose and crumbles easily in your hand is crucial, allowing for proper root growth and water drainage. Before planting your microgreen seeds in your beds or containers, remove any weeds or debris from the soil, then rake the surface to create a smooth, level, and even surface.
Sow And Cover Your Seeds
The next step in growing microgreens is to sow your seeds. Once you have selected the perfect spot for your microgreens and have prepared the soil, it’s time to plant. The process is relatively simple, but carefully following the packet instructions is crucial.
Many beginning micro growers mistakenly overseed their growing media, creating challenges, like mold, they would have otherwise avoided. So, it’s crucial to ensure you don’t overcrowd your microgreens, as this can lead to poor growth and unhealthy plant production. Moreover, proper spacing allows each seedling to receive adequate nutrients and sunlight, essential for their growth and development throughout their short growth cycle.
When sowing your seeds, it’s essential to gently press the seeds into the soil or cover them lightly and evenly with soil to prevent them from drying out or being displaced by heavy rain.
Some seeds, such as peas or sunflowers, are better suited to being soaked in water for several hours before planting. This process, known as pre-soaking, can help speed up the germination process and improve the overall growth of your microgreens. While not all microgreen varieties require a pre-soak, following the packet’s pre-soaking instructions provides the best results.
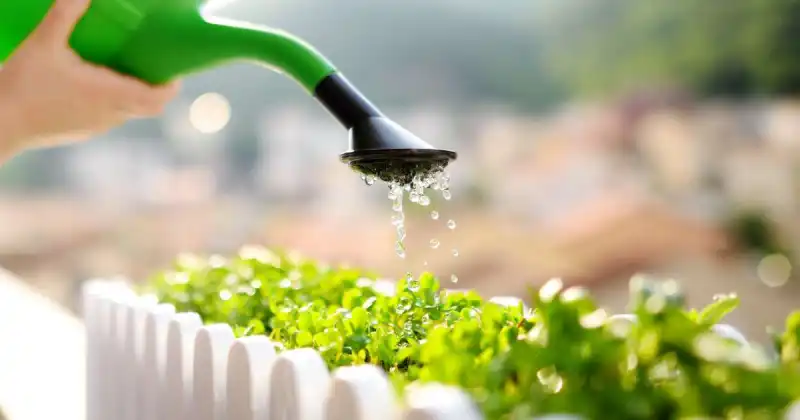
Water Properly
Moisture is crucial for the growth of microgreens, and it’s essential to water them correctly. However, as previously mentioned, overwatering can be as damaging as underwatering, so finding the right balance is crucial.
The best way to water your microgreens is to use a watering can, spray bottle, or hose with a gentle spray attachment. Although challenging, as your plants develop, it’s important to avoid getting the leaves too wet, which can cause mold growth. Instead, water your microgreens evenly and regularly to ensure the soil remains moist but not saturated.
Harvest Your Microgreens
Although some varieties have a longer growth cycle, after 10-14 days, most microgreens should be ready for harvesting. You can harvest them by snipping the stems just above the soil surface using a sharp knife or micro-tip pruners to avoid ripping or tearing the stems.
Check Lowest Prices On Micro Tip Pruners Now
Restore The Soil For Your Next Batch
To ensure that your microgreens continue to produce and your growth media remains healthy, replenish your soil after each harvest. For example, incorporate organic matter such as compost, aged manure, or leaf mold into your soil. This will improve the soil’s fertility and provide the necessary nutrients for your next batch of microgreens.
Conclusion
Microgreens offer a range of benefits and are easy to grow at home, indoors, or outdoors as these mighty plants provide a concentrated source of nutrients and can be used in various dishes.
When growing microgreens outdoors, choosing the right spot, preparing the soil or other growing medium, selecting the proper tools, and monitoring for potential pests and mold is essential.
And like many microgreen varieties, so long as the conditions are right and your plants are well hydrated, many micros enjoy growing outside, including radish, wheatgrass, cabbage, pea shoots, corn, and sunflowers. If you want to try your hand at outdoor microgreen cultivation, you’ll want to keep your plants in a raised bed, container, or tray that is well-draining for the best chance of consistent and productive yields.
So why not ditch the grocery store and start your outdoor micro garden today? Trust me, the satisfaction of growing and harvesting your microgreens is truly unbeatable!
Do you have success growing microgreens outside? We’d love to know the varieties and methods you employ for a successful process. So be sure to meet us in the comments below!
SOURCES
- National Library Of Medicine, National Center For Biotechnology Information – Ongoing Research On Microgreens: Nutritional Properties, Shelf-Life, Sustainable Production, Innovative Growing And Processing Approaches
- Wikipedia – Microgreen
- Mississippi State University, Extension – Home Gardeners Can Grow Microgreens
- IJMRASC – A Short Literature On Microgreens: Understanding Their Nature And Current Research
- ResearchGate – Innovative Farming Of Edible Micro Greens At Home And Their Nutritional Composition
- Purdue University, Extension – Grow Microgreens At Home
Related posts:
 How To Grow Microgreens At Home (definitive guide)
 How To Get Rid Of Mold On Microgreens (easy fixes)
 Do Microgreens Regrow After Cutting
 Microgreens vs Sprouts (uncover the differences and get growing)
 How To Water Microgreens (your in-depth guide)
 Microgreen Lights And The Importance Of Light Spectrum For Growing Nutritious Microgreens
