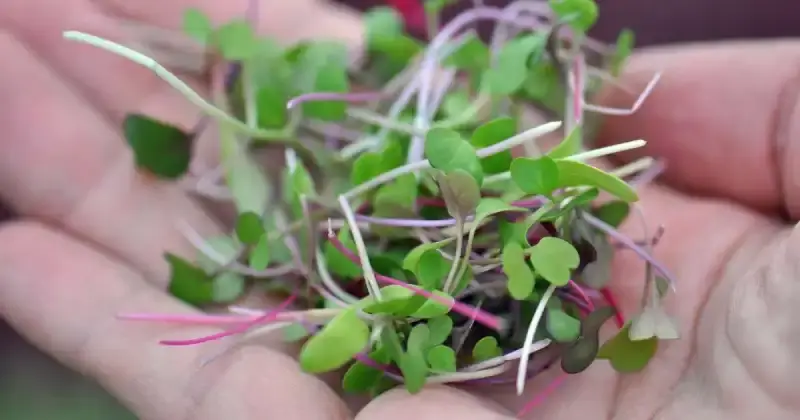
Microgreens are an emerging popular trend due to their widely discussed health benefits. But it’s not just because these tiny plants pack a powerful nutritional punch and taste delicious that makes them so desired. Micros are quick to grow and easy to manage, and you only need a small space, like a kitchen counter, to cultivate these plants year-round. However, learning how to water microgreens makes all the difference in reaping the full benefit of this highly nutritious food.
There are several ways to water microgreens, such as top watering, bottom watering, and using a hydroponic watering system. While top watering is often preferred in the beginning germination phase, bottom watering is more beneficial in the later stages of plant growth.
To grow your microgreens correctly, you must provide these little plants with the right amount of water, as too much or too little can have serious consequences. In addition, accurately watering your microgreens is essential to prevent mold from growing and damaging your crop.
Remember, to cultivate your micros, you’ll need to understand better what they need and when. To provide better insight, let’s look at each watering method in closer detail so you can select the proper strategy to grow healthy and wholesome microgreens at home.
Humble Highlights
- Discover the two most common and practical methods to water your microgreens so you can expertly grow your plants no matter their growth stage.
- Save money by knowing the hydroponic watering systems available and which kind may be right for you to grow your greens so you can cultivate your greens with a more “hands-off” approach.
- Save time by understanding what type of water and pH microgreens need to develop and mature correctly – even if you’re a brand-new micro grower!
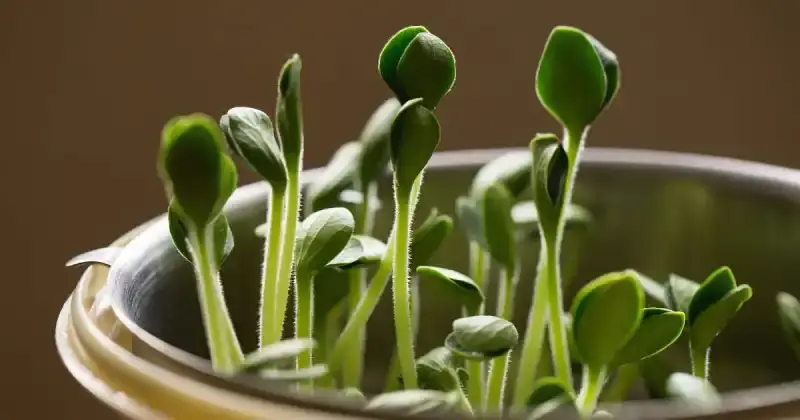
Top Watering Microgreens
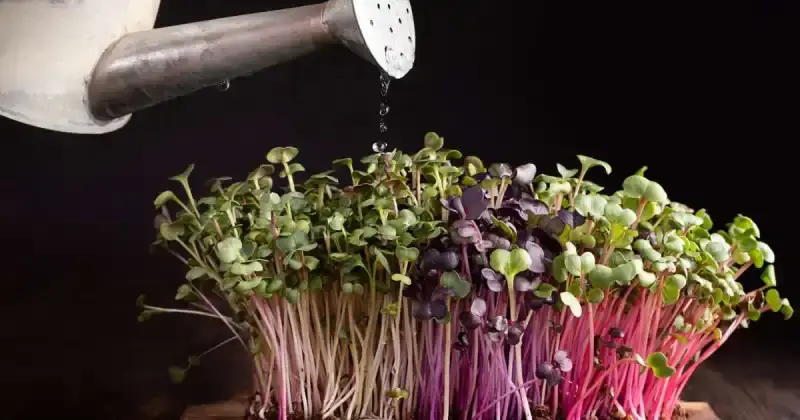
The method of top watering is best used when initially sowing your seeds and during the germination phase when seeds are first sprouting. However, this method also depends on your growing media, as different options like soil, coco coir, and a grow mat may all impact your watering process.
Two of the most popular media choices growers enjoy using are soil and coco coir in shallow trays; both work well for top watering. Top watering is just as it sounds. First, you moisten the sown seeds with water which rests atop the soil or coco coir, using a spray bottle or mister filled with water. Watering your microgreens in this more delicate and controlled way is essential because you are less likely to saturate the medium, disrupt your seeds, and saturate your tray. 1
For a beginning microgreen grower, watering your plants is vastly different than watering your backyard garden and may take a little time to adjust. Microgreens are young sprouting plants which makes them fragile, especially when they are first germinating, so it’s important not to overwater them, as your growth media and the seeds themselves may become soggy and mushy, creating an unhealthy environment. Conversely, if you don’t add enough water, your greens won’t germinate, leaving you with an inert tray that will have spotty growth at best, and at worst, you’ll likely need to discard.
When growing microgreens, your goal is to water your seeds to initiate seed germination. However, you’ll encourage stagnation if you don’t provide your greens enough water.
Whether using soil or coco coir, aim to moisten your growth medium, not saturate it. Your medium should feel like a sponge, not a wet, matted rag.
Waterlogged soil can develop mold that can quickly spread throughout your crop. Mold can also attract harmful bacteria such as E.coli, Salmonella, or Listeria, making you extremely sick.
How To Top Water Microgreens
Top watering is a simple process that I recommend until your seeds have germinated and started to grow their first seed leaves, also called cotyledon leaves. These leaves emerge from the seed itself and help provide the energy and nutrition needed to initiate proper germination.
Below is a simple step-by-step guide to top watering your microgreens.
Step 1 – Gather Your Necessities
You’ll need a spray bottle with a fine spray or a mister. Fertilizer is optional and can provide a few extra nutrients if using soil as your media. Fill your bottle with water, ensuring the liquid is at room temperature.
Step 2 – Begin Misting
Start spraying your micro container with light mists over the top of the growing media and seeds, moving from one side of your tray to the other while respraying areas that may remain too dry after your first pass.
Remember, you are looking for a moist tray, not a saturated one. Therefore, apply the water accordingly while feeling free to soak deeper into the soil, provided no puddles are forming at the surface. There is a delicate balance when watering. On the one hand, your seeds need moisture to grow, yet too much encourages the potential spread of disease and mold.
Step 3 – Add Fertilizer (Optional)
As this juncture, feel free to provide your microgreens an extra boost of nutrients by adding some liquid fertilizer to your watering container. However, be careful not to overdo it. While overwatering can lead to root rot and mold issues, over fertilizing can lead to “burning” of your delicate plants.
If using organic soil, free of dangerous chemicals and pesticides, fertilizer is likely not needed. Due to the extremely short growth cycle of micros, the soil and the microgreens seeds themselves will provide all the necessary growth you’ll require.
Additionally, growers who incorporate organic compost into their soil will find fertilizer redundant and even detrimental to the development of the plant’s growth. However, a liquid fertilizer may be considered if growing your tiny plants in an alternative media such as coco coir, which has no nutritional value, or hydroponically providing the grower control over what nutrients are introduced and when.
Personally, I wait to add any extra nutrients until I begin to bottom water my micros, which will be covered below. Remember, the seeds themselves have all the potential energy needed to germinate. As the initial cotyledon leaves emerge, they begin to capture light and initiate photosynthesis.
Because of the relatively short lifecycle of microgreens, typically only a week or two, some growers don’t even bother adding extra nutrients. It comes down to the preference of the individual and how they choose to grow their plants. Consider growing your micros with and without fertilizer to find what works best in accomplishing your goals.
Step 4 – Check Regularly
Frequently checking the moisture level is essential for your media, especially in hotter climates where the soil may dry out faster. It’s best to water as often as necessary, typically between one and three times per day. Although microgreens are super easy to grow, you’ll need to pay more attention to them throughout their growth cycle, albeit in shorter spurts. Watering is one of those tasks. 2
Step 5 – Wait For Germination
After only a few short days and proper watering, your microgreens seeds begin to sprout, at which point their roots start to develop, reaching deeper into the growth media. You can continue top watering in the same manner until the top shoots grow to around 1 to 3 inches in height.
Step 6 – Switch To Bottom Watering Or Continue Top Watering
Once the plants are a few inches tall, top watering may not be enough to satisfy your budding containers. Because roots are now developing, bottom watering may be a better option to keep your plants quenched while mitigating mold growth from forming atop your growing media.
Bottom Watering Microgreens
If you have tried top-watering a mature and full microgreens tray, you understand that it becomes increasingly difficult to spray through the thick forest of dense leafy foliage to reach the growing media below. And while it’s true that microgreens can absorb some water through the leaves and stems, the roots do a much better job of feeding the plant with nutrients and fluid, and bottom-watering is an easier and more practical technique at this stage of growth.
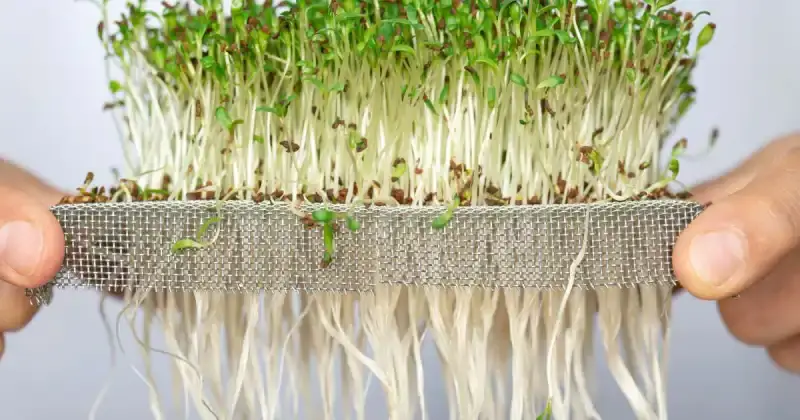
Bottom watering your microgreens saves you a lot of time and effort, and you will ensure the best possible absorption from your crops. However, for bottom watering to work appropriately, consider using seed trays, with the inner tray offering drainage holes and a second outer one holding the water.
The primary seed tray (the one with holes) allows the soil or coco coir to soak up water from the outer tray until fully saturated. When bottom watering, it’s essential to tilt the trays from side to side, ensuring the water is evenly distributed to all of your sprouting greens, especially the corners, as they tend to dry out faster. Lastly, after your media is damp, drain the excess moisture to prevent mold formation.
How To Bottom Water Microgreens
Like top watering, you must use the bottom watering method correctly to avoid any potential problems. Bottom watering needs to be carefully regulated as the extra water can cause root rot and mold in the bottom of your tray. As always, remain observant to catch any issues before they become more serious. 3
Below is a step-by-step guide on how to bottom water microgreens.
Step 1 – Gather Your Supplies
You’ll need a watering tray, like an old baking sheet, to capture the drained water and a cup or container to add the water. To keep things simple, use warm or room-temperature water for this task so as to not shock your tiny plants. Depending upon the growing media you’ve chosen, you may also want to mix in some liquid fertilizer with the water.
If opting to use a liquid organic fertilizer at this stage, a good one to consider is OceanSolution. This plant food has all 90 macro, micro, trace, and ultra-trace mineral nutrients within the solution and is easy to dilute in water before bottom watering your greens.
Step 2 – Begin Bottom Watering
Fill the tray with enough water to cover the soil beneath the plants. Then, dip your seed tray into the water until the liquid has been absorbed. To confirm your growth media has effectively wicked the moisture, gently press on the surface to ensure it is damp. Remember, a little water goes a long way in this process. You don’t want to completely saturate the surface of your media when bottom-watering due to the potential of mold formation. While this technique may take a little practice to finesse, it is a far superior way to water your greens.
Remove any remaining water from the bottom tray that was not absorbed and place the seed tray back into this bottom tray so any excess water can successfully drain from your growing media. Allowing your microgreens to evacuate any unused moisture assures you won’t be overwatering your microgreens.
Step 3 – Check The Soil Regularly
Microgreens roots are super absorbent and tend to wick lots of water, so don’t be surprised if they need regular watering daily. In fact, you should expect that they will. To ensure your microgreens are getting optimal moisture levels, check the surface of your growing media regularly by gently feeling around the base of each plant. If it feels overly wet, wait until it dries out before adding more water.
Step 4 – Enjoy The Results
Once you’ve bottom watered consistently, you should soon start seeing lush, healthy growth in no time! Correct bottom watering will help your microgreens thrive and give you plenty of fresh greens while lessening the chances of mold forming.
The video below on YouTube explains the entire process of preparing a water solution for microgreens by balancing pH and nutrients while demonstrating the bottom watering process.
Top and bottom watering are not the only two ways to get a healthy crop of micros, but these two options are the most common and practical, especially for beginning microgreens growers.
Alternative Ways To Water Microgreens
Another popular method that people use to keep their microgreens hydrated in through hydroponics. Hydroponics systems are more expensive and only practical if you grow a wide variety of microgreens with little time to maintain them, as these systems tend to automate a lot of manual work on your behalf.
Hydroponic systems are almost wholly automated once filled with water and liquid fertilizers. Therefore, the primary benefit of having a hydroponic system is that your microgreens crop receives a constant supply of water and nutrients throughout their entire growth cycle.
So What Is A Hydroponic System
Hydroponics systems come in various formats and kits but generally work the same. Water is supplied through an automatic pump or similar system to provide the plant roots with water.
Specific hydroponic systems will flood chambers full of water for set, timed intervals only to drain it back out and restart the process. Other standard methods allow water to soak gradually through a lightweight wicking media such as coco coir chips, perlite, vermiculite, and even grow stones.
Because of how they operate, soil is typically not used, nor needed, in hydroponic systems as roots often remain fully exposed to water and nutrients. However, if a growing media is required, you should use a soilless media such as the ones mentioned above, like perlite, growstones, and coco coir chips. Each of these types of growth media maintains excellent wicking capabilities without becoming boggy and drowning the roots of your microgreens. 4
Types Of Hydroponic Watering Systems
Several hydroponic systems are available commercially, so you may wonder which is best for growing microgreens. So let’s quickly cover your options, and I’ll explain which ones provide the greatest results.
- Aeroponics – These systems produce a mist that envelops the exposed roots for a continual water supply. These systems may require a sizeable investment, depending upon which you choose. However, microgreens can grow decently well in these units, but it is not suggested.
- Deep Water Culture Systems (DWCs) – Plants are suspended over a chamber of water and nutrients while continually oxygenated with a pump. Small systems are available, but larger systems for a decent microgreen crop can be costly and take up a fair amount of space.
- Drip Systems – These systems, also known as trickle or micro irrigation systems, are excellent for larger crops. They recirculate water and nutrients from a reservoir and drip this liquid directly onto plants. These drip systems do well for some vegetable plants but may not be best suited for growing smaller plants like microgreens.
- Ebb And Flow (Flush and drain) – One of my favorite hydroponic methods, ebb and flow systems flood a chamber with water and nutrients several times daily, then systematically drain the chamber after the roots have had time to absorb them. While these setups are great for microgreens, ensure the plants don’t dry out too quickly between watering cycles.
- Nutrient Film System – This system contains a film holding water and nutrients that constantly pass along plant roots set in channels. Roots are kept moist, making this a reliable system for growing microgreens.
- Wicking System – These systems are reliable for all micro growers, especially beginners. Your microgreens are planted in a wicking media, slowly drawing water and nutrients while keeping roots consistently moist. Although these wicking systems can work for plants of all types and sizes, they work very well for smaller crops like microgreens.
There are many hydroponic options for growing and nurturing your microgreens. If you choose to invest, it may be worth giving one of them a try, but only if you are committed to growing microgreens at scale and for the foreseeable future.
Because I don’t grow a large number of micros, I typically stick to traditional watering methods of top and bottom watering, as it gives me more control over my growing operation throughout the day.
Do You Water Microgreens During Germination
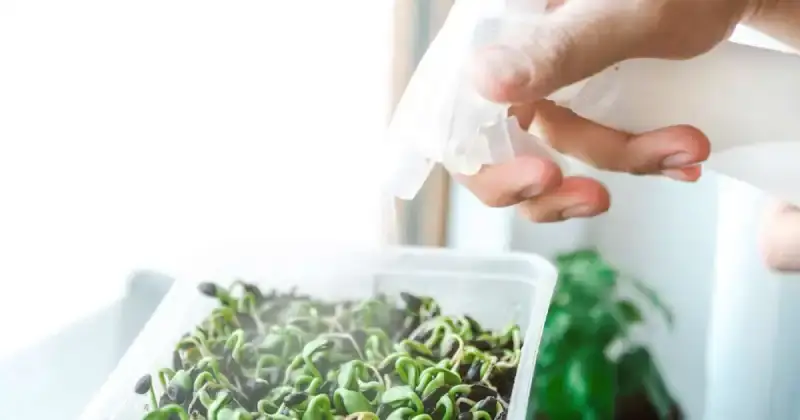
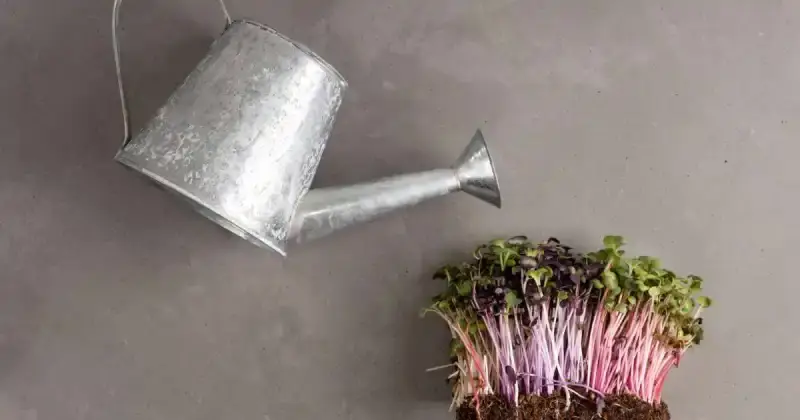
Watering microgreens during germination is an essential part of a successful growth process. During this delicate sprouting stage, spray your media and seeds with a water mister that dampens your tray or pot, not saturates. Also, carefully consider the moisture levels on the sides and corners of your containers, as these areas tend to dry out the fastest.

Germinating microgreens seedlings are susceptible to varying moisture levels, so it is vital to understand how much and how often to water them. Remember, too little water won’t allow the seeds to sprout, while too much can invite mold and disease to spread within your tray.
When preparing to germinate microgreens, consider the watering frequency, amount of water used, and methods for applying the water. 5
Watering Frequency
Microgreen seedlings need frequent watering to establish their root system in your growing media. Therefore, you should expect to water your microgreens at least once every 24 to 36 hours for optimal growth during germination.
Watering Amount
It’s best not to over or underwater your seedlings as this can stunt their development or cause death due to lack of oxygen from too much standing water that accumulates within the container.
When watering your seedlings, use enough liquid to moisten the soil’s surface without flooding your growth media. A good starting point is about one liter per square meter. However, you’ll need to adjust this amount depending on several factors, including your climate, humidity, temperature, ventilation, lighting, and air circulation. And because these elements are different for everyone, check that your media is moist to the touch, not saturated and soggy.
Watering Methods
When selecting a method for watering fresh micro shoots, several options are available, including:
- Hand-watering using a spray bottle or hose nozzle on mist setting (top watering)
- Automated drip irrigation systems (hydroponics)
- Wicking beds
- Self-watering containers like air pots which allow roots vital access to oxygen while controlling moisture levels
Whichever watering option you decide works best for you, ensure that all areas of your planting space receive adequate amounts of liquid evenly distributed throughout the tray or container.
Understanding proper watering techniques during germination helps ensure your microgreens get off on the right leaf and have everything needed for a healthy start. With careful attention given to both quantity and quality of water applied at regular intervals, success with sprouting these tiny but powerful plants is just around the corner.
How To Prevent Mold Growth On Microgreens
Mold growth is one of the most common problems when growing microgreens. Mold enjoys growing in damp conditions, and overwatering your microgreens is one of the primary factors that cause these conditions. The best way to prevent mold forming is to water your microgreens sufficiently without overwatering and provide a cool space with plenty of air circulation and ventilation.

If you experience mold on your microgreens, the spores often spread quickly throughout the rest of your container which can become a real challenge, threatening to ruin your entire crop. And if not addressed quickly, mold can cause roots to rot, inhibit nutrient and water uptake, and even cause leaves to become slimy. Mold also attracts the bacteria that cause salmonella, E.coli, and listeria, which, if ingested, can become severe, and you should contact your healthcare professionals. 6
Prevention is your number one tool for fighting mold in your microgreens. First, carefully observe your greens each day for signs of mold growth. If spotted, you’ll want to ensure it is indeed mold and not root hairs, a normal part of the microgreen growing process.
Second, if it is mold and the area is small enough, consider removing the affected growing media and plants and discarding them before it spreads further throughout your tray. You can also attempt to treat the moldy area by applying one teaspoon of 3% food-grade hydrogen peroxide mixed with two cups (16oz) of water and spraying the area with a mister.
Third, always sanitize your microgreen growing area and accompanying tools, especially between plantings. You can use soap and hot water to thoroughly wash your tools and trays and then air and sun-dry. You can take this one step further by adding one teaspoon of 3% food-grade hydrogen peroxide mixed with two cups (16oz) of water and gently misting your equipment and growing area.
Lastly, if you are not absolutely sure you’ve effectively removed the mold from your tray, discard your entire microgreens crop, properly sanitize your area, and start again. Fortunately, because microgreens have a concise growing cycle of only a few weeks, starting again won’t set you back a tremendous amount of time. And it’s better to know you’ve effectively resolved your mold issues.
Do You Water Microgreens Everyday
As microgreens seedlings begin to germinate and become established, you need to know how often to water them. Although different microgreens varieties and growing media may have different watering needs, your goal is to keep the media damp, not saturated. Gently and evenly spraying your greens once or twice per day is generally sufficient to keep them well-hydrated and germinating correctly.
While watering microgreens is an essential part of their growth and development, the frequency and amount of water you give your plants will directly affect the outcome of your crop. Therefore, it’s essential to understand how often to water them and in what quantity since providing your seedlings with too much water at once may cause root rot, mold, or other issues within your tray. 7
When it comes to watering microgreens daily, the key is balance. You want to give enough water for proper hydration without over-saturating the soil and creating puddles. As mentioned above, daily light misting should be enough, especially when top watering during the initial germinating stage. If your growing media looks and feels dry after one 24-hour period, you may need to increase the amount slightly. Too much or too little water can lead to unhealthy results either way.
With some trial and error and experience, you’ll eventually find the perfect balance for your microgreen garden. And now that we’ve discussed how often you should water microgreens let’s explore what type of water they need for optimal growth and health.
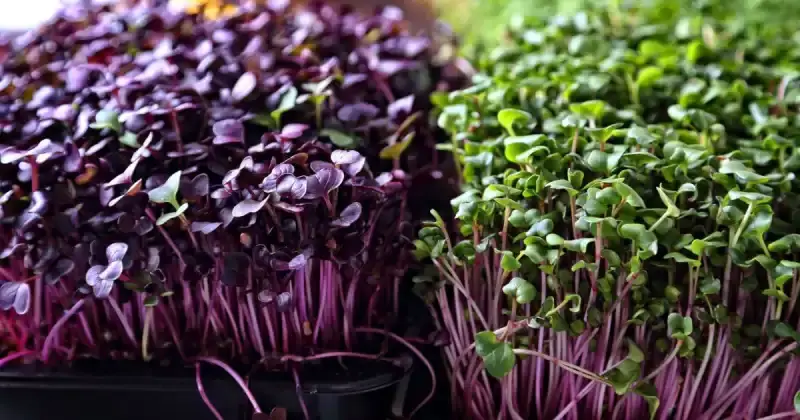
Like the plants in your backyard vegetable garden, microgreens have different watering frequencies and requirements. Therefore, before starting a watering schedule, follow the instructions on each seed packet for specific details about your particular variety.
What Type Of Water Do Microgreens Need
The best water for microgreens has a pH range between 5.5 and 6.5 and is free from chemicals such as chlorine which may inhibit nutrient uptake to some degree. Rainwater, distilled water, and filtered water are all decent options.
It’s essential to understand what type of water microgreens need to achieve the best results. So let’s look at several water sources you can apply to hydrate your micros.
- Rainwater is ideal for microgreens, as it has all the nutrients they require, such as nitrogen and phosphorus.
- Distilled water usually has a neutral pH of around 7 which is just outside the perfect range but should do fine.
- Filtered water that removes chlorine and other chemicals also works well for watering microgreens. Like distilled water, it generally has a pH of 6-7.
- Tap water can be used, provided it’s not too soft or hard. A pH level below 7 may cause nutrient deficiency if used alone. Hard water may also contain excess minerals that are unnecessary for microgreen growth. In general, be cautious about using tap water to water your greens.
- Spring water should be used sparingly. Its high mineral content often creates a higher pH, and excess minerals may lead to over-fertilization, harming your maturing plants. 8
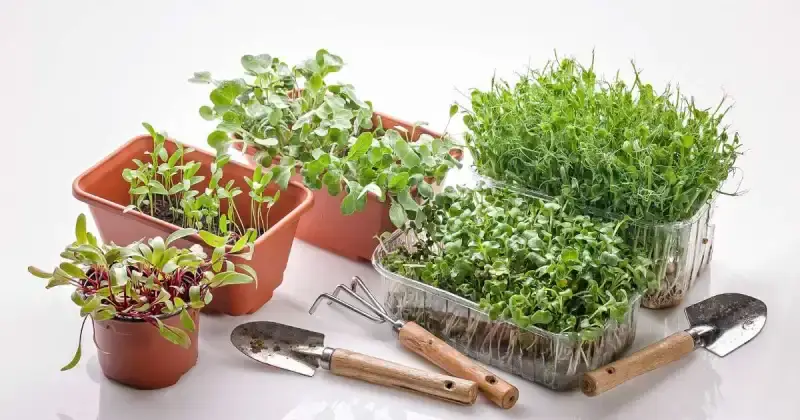
Which Containers Are Best For Growing Microgreens
When growing microgreens, many options are available depending on your needs. Whether you are using containers, pots, hydroponic trays, or seed starter kits, plenty of good choices can help you start growing your greens quickly and efficiently.

Here are some key points to remember when choosing a suitable container for your microgreens.
- Growing containers should offer good drainage without being too large or deep. Because micros have a short growing period of only a few weeks, shallow containers work best for their tiny roots, and depth is unnecessary for such an abbreviated growing period.
- Although depth is nonessential, microgreen pots should provide ample room for roots to grow during their growing cycle, and your growing media should allow adequate airflow and drainage.
- Hydroponic trays require little maintenance once set up with water reservoirs.
- Seed starter kits contain everything necessary to plant and harvest seeds quickly.
As previously mentioned, it is also essential that whichever container option you choose allows enough space so your plants have plenty of ventilation, air circulation, and light exposure. 9
Conclusion
Understanding the intricacies of watering microgreens is essential for any humble gardener to achieve the best results. By following the guidelines in this article, you’ll be well on your way to having a successful crop of these nutrient-packed greens.
Remember that when it comes to the watering process, consistency is critical. Ensure you provide your plants with enough moisture to create a damp growing media without needlessly saturating it. You will also want to pay close attention to temperature and container selection for optimal greens growth.
You can effectively water your flourishing microgreens in various ways, including top and bottom watering and a hydroponics growing system. Choose a method that suits your needs, keeps your seeds hydrated, and provides the appropriate type of water with the correct pH balance so your seedlings enjoy a healthy germinating process and get off to a quick and productive start.
Finally, keep an eye out for any diseases or mold that may arise during the growing process so you can actively take steps to lessen the likelihood that it will run amok and ruin your crop. Just as with anything else, growing microgreens takes a little patience. So, make it a fun experience for the whole family can get involved with and enjoy the green journey of this year-round superfood.
Do you grow microgreens successfully? Which watering method do you use to water your greens? Join the discussion below and let us know!
SOURCES
- PBS Utah – How To Grow Microgreens At Home: Planting And Watering
- University Of Arizona, Cooperative Extension – Microgreens
- University Of California, Master Gardener Program Of Sonoma County – Growing Microgreens
- University Of Illinois Urbana-Champaign, College Of Agricultural, Consumer & Environmental Sciences – Small, But Mighty Microgreens Are Easy To Grow Indoors
- National Library Of Medicine, National Center For Biotechnology Information – Microgreens – A Comprehensive Review Of Bioactive Molecules And Health Benefits
- Centers For Disease Control And Prevention – E.Coli (Escherichia Coli) Symptoms
- Wikipedia – Salmonella
- University Of California, Agriculture And Natural Resources – The Perils Of Over-Fertilizing Plants And Trees
- Penn State University, Extension – Production And Harvesting