
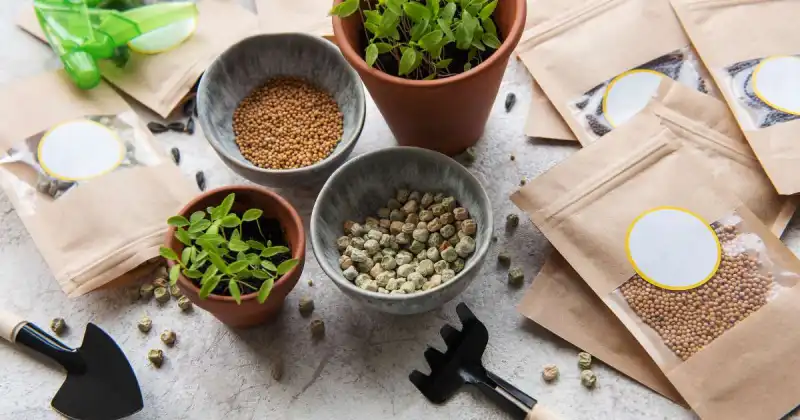
Have you ever wanted to learn how to grow microgreens without soil? Here’s your chance to cultivate fresh and healthy microgreens at home in limited space and without the hassle of traditional soil-based farming. Fortunately, you can now grow soilless microgreens, even if you’re a total beginner! As someone who loves to cook with fresh, homegrown ingredients, I was intrigued to learn how to grow microgreens in this innovative manner and decided to give it the old college try.
Generally, the three most common methods to grow microgreens without soil are aquaponics, hydroponics, and aeroponics. Hydroponics is the most well-known for indoor growing among these methods due to its affordability and ease of setup and maintenance for seasoned and novice growers.
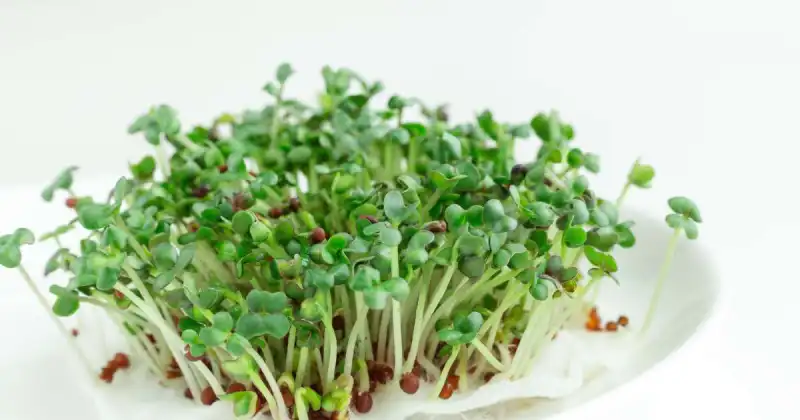
If you’re already a true microgreen fan like me, you know just how tasty and nutritious these little plants can be. These greens have so much to offer regarding vitamins, minerals, and flavor – it’s no wonder why health-conscious foodies love them.
In this article, we’ll look closely at various methods of growing microgreens at home and explore the pros and cons of each to help you decide which one works for you. I’ll also provide a step-by-step guide on growing your greens and the essential equipment you’ll need so you’ll have all the knowledge to grow fresh micros at home without the mess!
Humble Highlights
- Learn the three most popular soilless techniques to cultivate fresh, tasty microgreens at home to determine which method suits your growing needs!
- Quickly determine and identify essential microgreen growing factors that can make or break your harvest PLUS discover what basic equipment is necessary to develop your greens hydroponically so you can grow confidently.
- Save time by knowing these 6 soilless growing media options, and save money by knowing what lights and nutrients your micros need for fuller, healthier harvests so you grow successfully throughout the year.
Choosing The Best Techniques For Growing Microgreens Without Soil
There are three popular techniques microgreen growers use to cultivate their plants, including:
- Hydroponics
- Aeroponics
- Aquaponics
Let’s look at each system’s advantages and disadvantages to help you decide how to grow your microgreens successfully.
Hydroponics
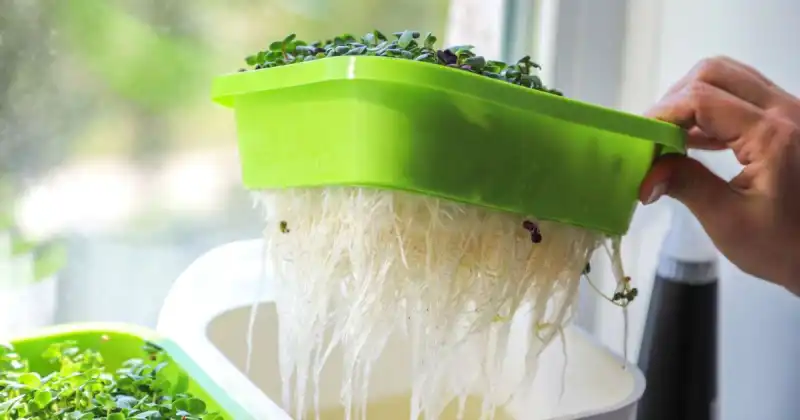
Hydroponics is a method of growing microgreens that uses water and liquid fertilizer solutions instead of soil and compost for plant nourishment. Hydroponics has a rich history dating back to ancient times, from the Hanging Gardens of Babylon to the sophisticated “chinampas” of the Aztecs.
In the 1600s, Jan van Helmont observed that plants draw nutrients from the water, and in 1699, John Woodward emphasized the crucial role of minerals in water for plant growth. Finally, in the early 1900s, Dr. William F. Gericke and his team at UC Berkeley coined the term “hydroponics.” They pioneered outdoor hydroponic crop cultivation, laying the foundation for modern hydroponic gardening methods growers use today. 1
Advantages Of Hydroponics
Growing fresh microgreens without soil eliminates tedious tasks like weeding and tilling if growing outside. As a result, harvesting becomes cleaner and more straightforward. In addition, the water used in hydroponics can be recycled and reused, leading to significant water savings. Hydroponics also requires less equipment and maintenance than other farming systems covered below, like aquaponics and aeroponics. Moreover, the pH levels of the nutrient solution you’ll need to manage are easily controlled for optimal nutrient uptake of your greens. 2
Hydroponics promotes faster growth and fewer pests and diseases, reducing the reliance on herbicides and insecticides, which saves you time, money, and labor. And because fewer chemicals are used in cultivating your plants, growers become environmentally friendly by reducing chemical runoffs, leading to less pollution in streams and land.
Check Lowest Prices On Self-Watering Microgreen Kits
Disadvantages Of Hydroponics
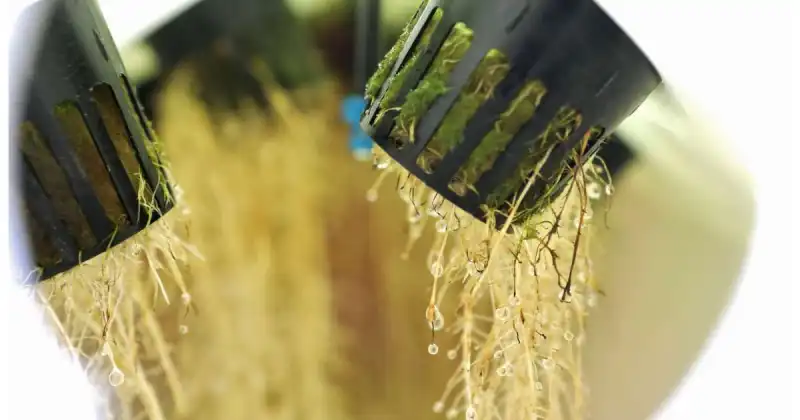
Practicing hydroponics requires more commitment, as managing water demands special care. Growers must refill reservoirs and monitor pH levels regularly to ensure their microgreen crop grows well. Submerged roots also receive less oxygen, leading to smaller plants and reduced yields. In addition, bacteria growth can escalate quickly in a hydroponic environment, so vigilance is crucial throughout the growing process.
Initial and ongoing costs for maintenance, nutrient solutions, and functioning parts must also be considered when setting up any hydroponic system. In addition, indoor systems may also have higher electricity costs due to lights, fans, timers, and pumps. However, increased productivity often offsets these expenses, making hydroponic gardening a worthwhile investment for many, especially those growing microgreens for their personal consumption.
Aeroponics
Aeroponics or vertical farming is another excellent and soil-free method for growing microgreens. While sharing similarities with hydroponics, aeroponics sets itself apart by the unique environment in which the roots are suspended in the air and nourished by a fine mist of nutrient-rich water delivered by misters or a spray bottle.
Upsides Of Aeroponics
Aeroponics produces the highest quality microgreens due to its closed-loop system requiring little water and circulating nutrient-rich mist, leading to optimal nutrient absorption and promoting faster microgreen growth. Additionally, suspended roots promote superior aeration and oxygen absorption for your crop. At the same time, the enclosed environment allows maximum control over all variables such as light exposure, temperature, humidity, and pests, making pesticides and other chemicals unnecessary and the system eco-friendly. 3
Besides saving up to 90 percent or more on water costs, aeroponic systems are also space-efficient for growing microgreens. The average aeroponic system saves roughly 75 percent or more space than hydroponics, making aeroponics a more affordable and practical alternative for those growing in close quarters – yes, I’m looking at you, urban gardeners.
Downsides Of Aeroponics
Although aeroponics is an excellent method of growing microgreens, it’s essential to understand the risks. Depending on the model, setting up an aeroponic system can be expensive and complex, requiring specialized equipment and machinery. In addition, much like hydroponic systems, dependence on power makes aeroponic microgreens vulnerable to sudden outages, which can quickly lead to crop failure.
Further, regular disinfecting of the root chamber is necessary to prevent contamination from waterborne pathogens. Also, operating and maintaining an aeroponic system may require high technical skill and knowledge, making it a less popular option for beginning micro growers who may only develop their greens for themselves and their families.
Aquaponics
Aquaponics revolutionized farming by introducing a symbiotic relationship between fish and plants. Fish provide natural fertilizer, while plants filter the water, creating a mutually beneficial environment. The correct fish-to-plant ratio is critical to avoid overburdening an aquaponic system. However, aquaponics can yield exceptional results when you achieve the right balance, providing regular fresh greens and a steady source of protein from the fish.

Benefits Of Aquaponics
Aquaponics eliminates the need for expensive fertilizers and reduces water, land, and energy usage while producing higher yields without chemicals or pesticides. In addition, these systems are typically easy to set up and surprisingly suitable for beginning micro gardeners. What’s more is that aquaponics can be utilized indoors or outdoors, providing sustainable sources of nutrition.
Check Lowest Prices On Aquaponic Growing Systems
Drawbacks Of Aquaponics
One challenge of growing microgreens using aquaponics is maintaining the delicate balance between fish and plants mentioned above. Growers must ensure that the fish-to-plant ratio is well maintained for optimal results, for any imbalances can quickly lead to the loss of fish and plants.
Moreover, setting up an aquaponic system can be expensive, and maintaining it requires regular feeding and care for the fish to stay healthy. In addition, there may be additional regulatory issues for large-scale commercial growers, as aquaponics falls between fish farming and traditional farming. Finally, aquaponic systems require more water than other farming methods because water is necessary for fish and plants.
Picking The Perfect Microgreen Seeds
Because seeds are susceptible to mildew, choosing the best microgreen seeds means selecting them from a reputable company. Poor quality may result in uneven yields, no germination, or contaminated seeds containing pathogens on the hull’s exterior. Choosing quick-growing and easy micro varieties is also helpful, especially for new growers.

Growing microgreens is about selecting the right seeds for optimal flavor, color, and nutrition. But with so many seeds and suppliers available, it can be overwhelming to know where to begin. One crucial factor to consider when selecting seeds is your expertise in farming, as some seeds may be more challenging to grow for beginners. 4
Check Lowest Prices On Microgreen Seed Mixes
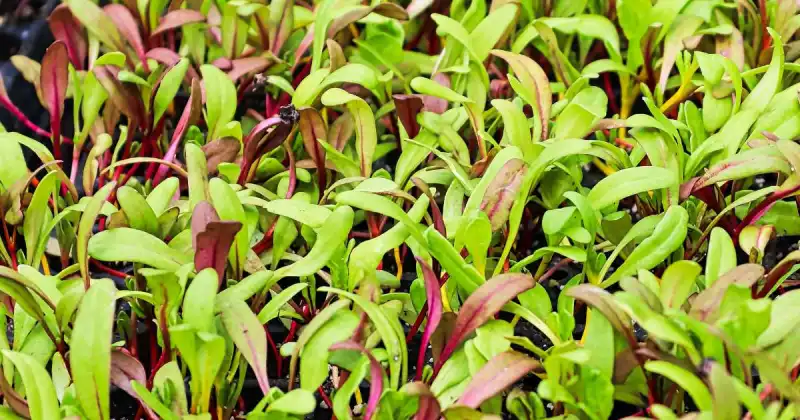
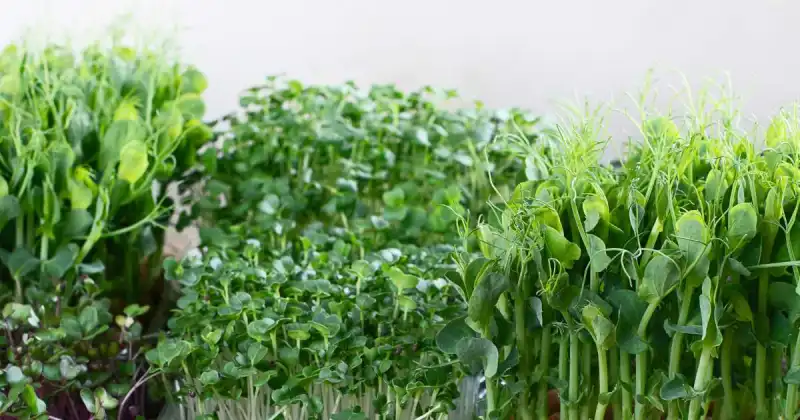
Here’s a list of commonly grown microgreens
| Microgreens Easiest To Grow | Microgreens Most Difficult To Grow |
|---|---|
| Red cabbage Collard Kale Lettuce Chinese cabbage Broccoli Radish Bok choy Mustard greens Turnip Sesame Tatsoi | Amaranth Arugula Beets Basil Chives Cilantro Carrot Beet Chard Pea shoots Mustard Parsley |
Sowing Seeds And Germination
Properly germinating seeds is crucial for optimal microgreen growth. Several steps should be followed for successful microgreen germination, including:
- Pre-soaking your seeds
- When growing your micros without soil, line your container with a damp paper towel
- Add seeds, and cover them with another layer of moist toweling
- Keep your seeds in a dark place (typically for a few days) as your seeds begin to germinate
- After this blackout period, subject your newly sprouted micros to light, making sure to keep your towel slightly damp
It’s important to note that although not all seeds should be pre-soaked before sowing, some larger seeds or those varieties with harder exterior shells will expedite the germinating process when pre-soaked in water. Read and follow the seed label’s instructions to see if soaking is necessary. Depending on the variety you’re cultivating, your greens should be ready in a week or two. 5
I found a great video explaining how easy it is to grow microgreens at home without soil. With this step-by-step tutorial and just a few simple items, like moist paper towels, seeds, and containers, you can incorporate these healthy greens into various dishes to improve taste, visual appeal, and nutrition.
| Seeds Requiring Pre-Soak | Non-Pre-Soak Microgreen Seeds |
|---|---|
| Broccoli Cabbage Cauliflower Green Pea Clover Collards Cilantro Kale Kohlrabi Fenugreek Radish Sunflower Turnip Beet | Arugula Basil Canola Chia Cress Most mustards Flax Pak Choi Mustard |
Other Factors To Consider When Choosing Microgreen Seeds To Grow
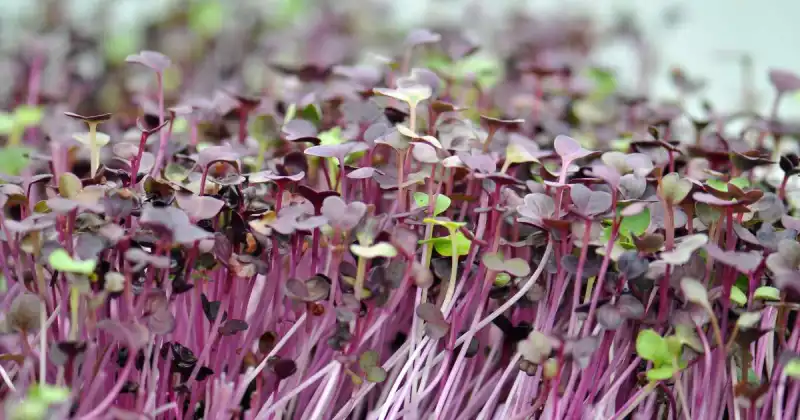
Choosing microgreen seeds goes beyond ease of growth. Essential factors like flavor, appearance, nutritional value, and yield potential are vital in growing microgreens successfully. Experimenting with different seeds can uncover exciting new flavors and increase nutrient intake as you incorporate them into various dishes in the kitchen. In addition, brilliant purple, red, and yellow hues of certain microgreens provide a stunning visual that can enhance the overall appeal of your cuisine.
Here’s an excellent resource table of the most common microgreen seeds to guide you based on the abovementioned factors.
| Microgreen | Germination Time (days) | Harvest Time (days) | Color | Flavor | Nutrient Content |
|---|---|---|---|---|---|
| Amaranth | 5 | 16 | Striking dark-burgundy stems and fuschia-tinged leaves | Delicate and earthy | Rich in protein, iron, calcium, Vitamin A, and Vitamin C |
| Arugula | 7-10 | 14 days | Medium green | Nut-flavored and peppery; spicier when leaves are younger | Rich in vitamins and numerous trace elements |
| Basil | 6 | 21 | Varies by variety; can be dark or bright green | Varies by variety, including lemon, lime, sweet, and cinnamon flavors | Provides calcium, Vitamin C and K |
| Beets | 5 | 18 | Red | Earthy | Rich in vitamins A and B, antioxidant |
| Broccoli | 5 | 10 | Green | Slightly bitter | Rich in fiber, minerals, and vitamins A and C |
| Cabbage | 6 | 10 | Dark purple | Mild cabbage | Contains Vitamin C |
| Carrots | 10 | 30 | Green | Delicate carrot | Rich in antioxidants, good for the eyes and skin |
| Celery | 14 | 36 | Light-green | Celery | Calcium, potassium, magnesium, phosphorus, and zinc |
| Cilantro | 6 | 18 | Green | Sage and citrus | Vitamins A, C, and K |
| Clover | 10 | 18 | Red/White | Nutty | Vitamins A, B, and C |
| Collard Greens | 5 | 16 | Green | Slightly bitter | Vitamins A, C, and K |
| Corn Shoots | 7 | 14 | Yellow/Green | Sweet and tender | Vitamin C and folate |
| Kale | 5 | 14 | Green and purplish-red | Intense flavor | High in vitamin C, A, and K |
| Dill | 5 | 14 | Feathery green | Distinctive dill aroma and flavor | High in antioxidants |
| Lettuce | 6 | 14 | Light green, deep red, green | Slightly sweet, nutty flavor. bitter | High in vitamins and minerals |
| Radish | 5 | 12 | Purple, soft green | Tangy, spicy | Rich in vitamins, minerals, and antioxidants |
| Mustard | 4 | 14 | White, red, green | Hearty, spicy, intensifying with age | Rich in antioxidants |
| Shungiku | 7 | 12 | Green | Crisp, aromatic, carrot-like flavor | Rich in carotenoids and potassium |
Preparing The Equipment To Grow Microgreens Hydroponically
Particular tools and equipment are necessary to correctly and consistently grow microgreens hydroponically, including:
- Growing trays. These serve as the foundation for growing microgreens. Look for trays that have drainage holes to allow excess water to escape.
- Growing medium. Various soilless growing mediums, such as coconut coir, peat moss, and vermiculite, are available. It’s best to choose one of these mediums designed explicitly for growing microgreens and helps you achieve your individual goals.
- Microgreen seeds. The type of seeds you select depends on the variety of microgreens you want to grow. Look for high-quality, organic seeds that are specifically labeled to grow microgreens.
- Watering can or spray bottle. You’ll need a way to water your microgreens regularly without disturbing the delicate seeds. A watering can or spray bottle with a delicate mist setting will do the trick. 6
- Grow lights. You’ll need plenty of light to grow microgreens, so investing in a set of grow lights is necessary. Look for lights that emit full-spectrum, white light to mimic natural sunlight.
- Thermometer. It’s essential to monitor the temperature of your developing microgreens, as they have specific temperature requirements. A digital thermometer allows you to measure the temperature accurately.
- Humidity dome (optional). A humidity dome helps keep the growing environment moist and humid, essential for growing microgreens. Domes are especially useful in dry climates or winter when indoor air is the driest.
- Fan. Airflow is crucial for healthy microgreen growth. A small fan or gentle breeze can help reduce humidity, prevent fungal growth, and promote sturdy stem development.
- Timer. A timer allows you to automate the growing process. You can set your timer to control the lighting and water cycles, ensuring your microgreens get the light and water they need to thrive.
- Net pots. These hold the growing medium in place while supporting the plants with holes on the sides and bottom. Additionally, net pots allow water to flow freely through the growing medium, providing the microgreens with the right amount of moisture.
- Support system. Depending on the type of microgreens you are growing, you may need a support system to hold the net pots in place. A simple shelf or a frame made of PVC pipes can provide the necessary support for your growing needs. Consider using a trellis or wire mesh to help the microgreens grow upward and prevent them from falling over.
Check Lowest Prices On Microgreen 1020 Trays
Preparing The Growing Media
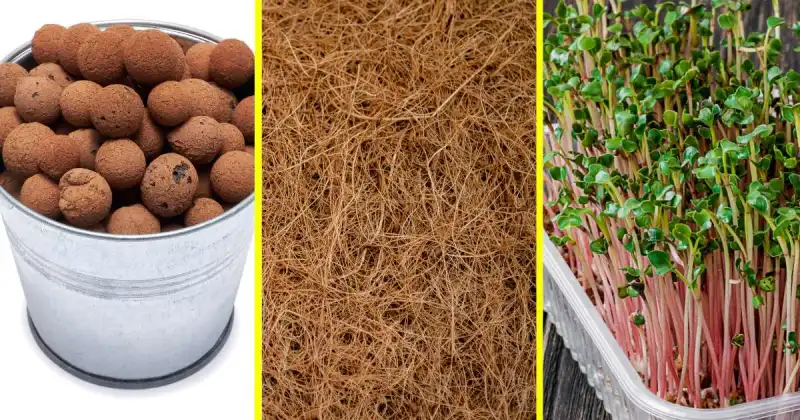
Before you start growing microgreens, choosing suitable growing media is crucial. The growing media is needed to help sprout your micro seeds and provide them with the necessary nutrients. You can choose from several types of growing media popular with microgreen growers, including rockwool, vermiculite, perlite, coconut coir, sand, and clay pellets.

Rockwool
This unique growing medium boasts an excellent water-holding capacity and is made from volcanic rock, limestone, and coke. Rockwool is also relatively inert, making it an ideal substrate for plant growth.
Check Lowest Prices On Rockwool
Vermiculite
When heated, vermiculite forms a sponge-like particle that can be used as an effective growing medium. However, it’s important to use caution when using vermiculite because it can create dust particles that may clog hoses and filters. Vermiculite should be blended with another loose material, like perlite, to help prevent water retention and lack of air space. 7
Check Lowest Prices On Vermiculite
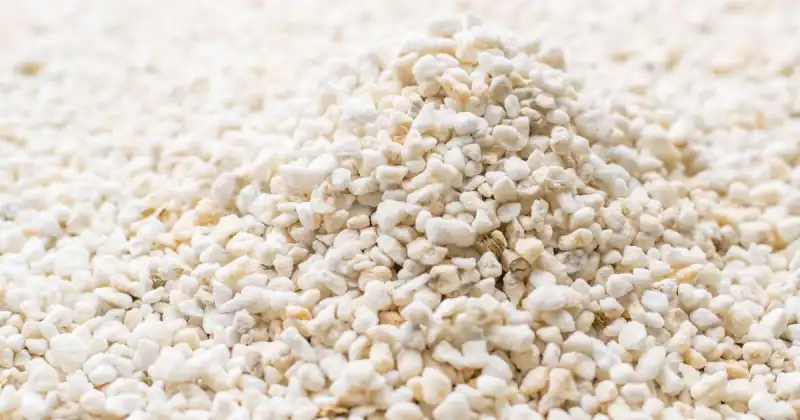
Perlite
This type of volcanic glass can absorb and hold large amounts of water. When heated, perlite expands up to 20 times its original size due to internal air pockets. However, perlite can be discarded after use because it does not provide essential plant nutrients.
Check Lowest Prices On Perlite
Coconut Coir
Coir, derived from the coconut husk, is a viable alternative to rockwool due to its organic nature. Coco coir can also be formed into compressed blocks or slabs but does contain sodium, which may require water leaching or soaking to remove excess sodium.
Check Lowest Prices On Coconut Coir
The video below details the tools you’ll need for an easy, practical, and, most importantly, highly producing soilless microgreen setup.
Sand
Sand is a small coarse rock grain of varying sizes with low water-holding capacity and high weight density. Before use, sand may be contaminated with clay and silt particles, which must be removed. Once sanitized, sand is frequently added to organic soilless mixes to add weight and improve drainage.
Clay Pellets
Clay pellets are sterile, inert, and range in size between 1 to 18 mm. Their free-draining physical structure allows for the accumulation of water and nutrient elements. Fortunately, these pellets are reusable if sterilized, can be an excellent choice for a soilless microgreen setup, and are the most common medium used in aquaponic systems.
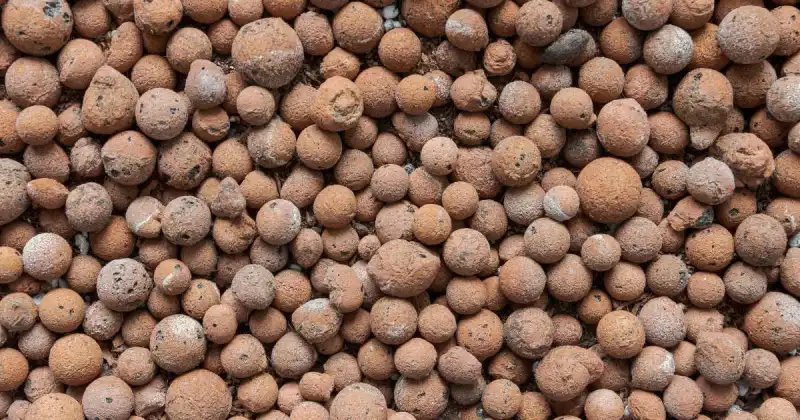
Check Lowest Prices On Clay Pellets
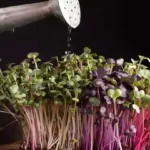
Managing Light And Temperature
Growing microgreens through hydroponics requires an understanding of light and temperature. Hydroponically grown microgreens need at least 12 hours of artificial light per day, and the proper lighting depends on enclosure type, plant type, system size, ventilation, and budget.
But how do you choose the right type of lighting for your hydroponic system? As previously mentioned, there are various factors to consider, such as the type of enclosure, plant type, and system size.
However, fluorescent tubes are a good option if you’re on a low budget. Compact Fluorescent Lamps, or CFLs, perform better for small systems, while HID (high-intensity discharge) lights are more expensive but more efficient and produce more light. However, HID lights also make more heat, so ventilation is crucial to your setup if you opt for these. 8
LED lights are the way to go if you want the high-tech option. Although they are costly initially, they use less electricity and produce less heat. Plus, they can be calibrated to create the same spectrum of light the plant needs for optimal growth.
Check Lowest Prices For Microgreen LED Lights
Best practice also dictates you monitor humidity and temperature levels in your hydroponic system. Neglecting this may lead to drying roots on one end of the spectrum to the plant becoming waterlogged, resulting in crop loss on the other.
Check Lowest Prices On Dehumidifiers
Remember, roots are more exposed in a hydroponic system than in soil-based gardening, so taking care of your plant’s root system is crucial. In addition, properly managing light and temperature allows you to grow healthy and thriving plants in your hydroponic system.
Watering And Feeding Your Microgreens
Proper watering and feeding are crucial when growing microgreens without soil. Overwatering is a common mistake, especially for new growers, leading to root disease, mold growth, drowning plants, and risking the loss of your entire crop. On the other hand, low or high water-holding substrates have different irrigation needs, and providing organic and natural sources of nutrients can increase overall yields.
Although debate continues on whether microgreens need nutrients after germination begins, I suggest you experiment to see what works best for you. One side agrees that because micros have a short lifecycle of a week or two, these tiny plants already have all the energy they need in the seed. However, others counter that a liquid nutrient solution should be added to help boost production, refine color, and improve the taste. 9
As for myself, I prefer to add a nutrient solution in the bottom watering practice I adhere to with my microgreens. Although my plants would likely do well without it, adding it does provide a fuller plant with a denser canopy and enhances the flavor. So, if you choose to use them, monitoring and adjusting nutrient solutions ensures appropriate nutrient levels for optimal growth.
Check Lowest Prices On Liquid Fertilizers For Microgreens
Types Of Nutrient Solution
In hydroponic gardening, plants receive nutrients through water rather than the soil. Therefore, the nutrient solution is crucial to a successful hydroponic system. Various nutrient solutions are available, and learning the right one to give your microgreens can make a significant difference in plant growth and yield.
Let’s take a look at some different types below.
Macronutrients
Macronutrients are essential elements plants require in relatively large quantities for their growth and development. In addition, these nutrients are necessary for the plant’s metabolic processes. Remember, deficiencies in these macronutrients can result in stunted or uneven growth and poor yields, so it’s best to have these primary components covered when cultivating your greens.
The three primary macronutrients are nitrogen, phosphorus, and potassium (also known as NPK). Nitrogen is responsible for leafy growth and plant size. At the same time, phosphorus is essential for root development, flowering, and fruiting. Lastly, potassium is necessary for plant health and disease resistance.
Check Lowest Prices On Hydroponic Nutrients
Secondary Nutrients
Secondary nutrients are just as vital as the three primary macronutrients, but plants require them in smaller amounts. These secondary nutrients play a crucial role in the overall health and growth of the plant. For example, magnesium (Mg) is essential in photosynthesis and helps regulate enzyme activity. Calcium (Ca) is crucial for cell division, cell wall formation, and proper root development.
As with macronutrients, plants can suffer from deficiencies without secondary nutrients, resulting in slower growth rates, yellowing leaves, and poor fruit production.
Trace Elements
Trace elements are critical for plant growth, even though they are only required in minimal amounts. Trace elements include sulfur, iron, manganese, zinc, copper, boron, and molybdenum. Each element is specific to various plant processes, such as photosynthesis, energy transfer, and enzyme activation.
Check Lowest Prices On Digital Waterproof Hydroponic Water Meters
Harvesting And Storage
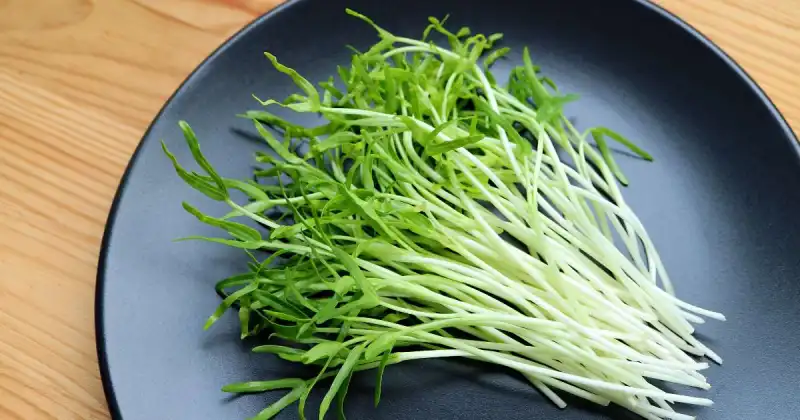
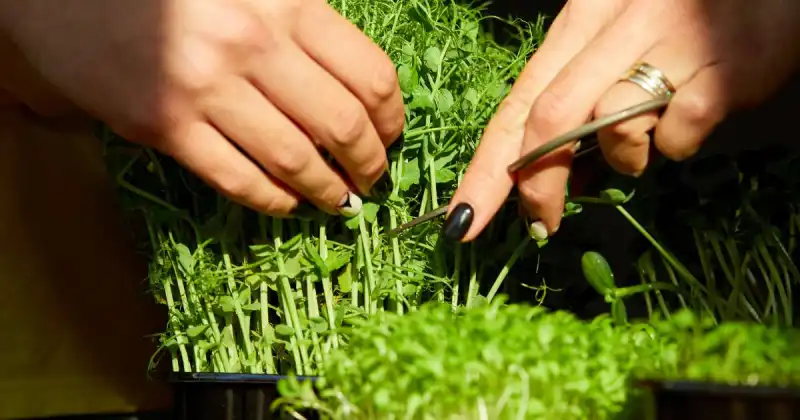
Before harvesting microgreens, ensure they have reached the ideal height of about 2 to 3 inches. If growing your micros outside, harvesting can occur in the early morning or late evening when temperatures are cooler and plants are usually shaded from direct sunlight. Use micro-pruners or sharp scissors to cut the microgreens at the base of the stem, and be careful not to damage the remaining plants while cutting.
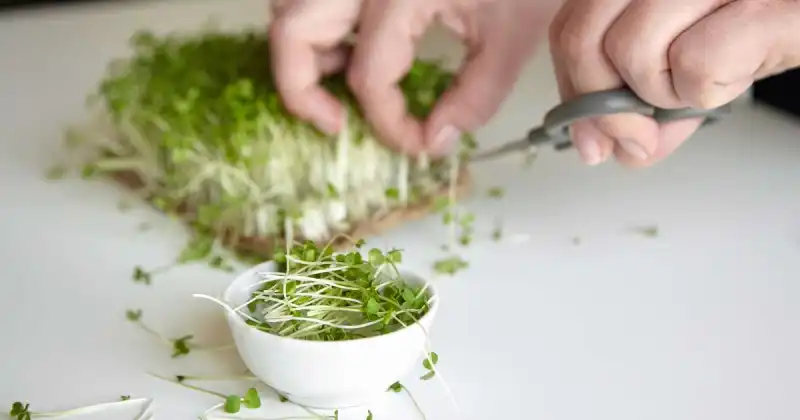
After harvesting, it’s best to wash them thoroughly, spin them dry with a salad spinner, or pat them dry with a paper towel or towels. Then, store your greens in a plastic container in the refrigerator, or use them immediately in your meal. 10
Check Lowest Prices On Micro-Pruners
You can wrap your freshly cut microgreens in a damp paper towel to keep them moist for extended storage for up to one week. However, remember that the longer you store them, the more nutrients they lose, so it’s best to consume them as soon as possible for optimal health benefits, taste, and color.

Conclusion
Growing microgreens at home without soil is becoming increasingly popular among growers due to its many benefits. Hydroponics, aquaponics, and aeroponics are the most commonly used techniques, each offering unique advantages and disadvantages.
Hydroponics is relatively low-maintenance and easy to set up. Aquaponics is an excellent choice for sustainably producing and cultivating your fish and greens at home. On the other hand, aeroponics provides some of the highest-quality microgreens, so there’s something suitable for everyone, no matter your needs, resources, or goals.
But selecting the best growing method is only part of developing micros at home. Essential factors such as sowing your seeds correctly, preparing your equipment, choosing your growing media, and managing light and temperature are all foundational ingredients when growing microgreens throughout the year.
So, if you’re starting your soilless microgreens journey, it’s crucial to understand that the key to unlocking the full potential of your microgreens lies in selecting the best methods tailored to your specific needs.
Do you consistently grow microgreens at home in one of these soilless methods? We’d love to know what tips and strategies you’d like to contribute to your fellow growers by leaving a comment below!
SOURCES
- University Of Minnesota, Extension – Small-Scale Hydroponics
- MDPI – Growth And Biochemcial Composition Of Microgreens Grown In Different Formulated Soilless Media
- Wikipedia – Aeroponics
- MDPI – Effect Of Storage Temperature On Storage Life And Sensory Attributes Of Packaged Mustard Microgreens
- MDPI – Quality Evaluation Of Indoor-Grown Microgrens Cultivated On Three Different Substrates
- ResearchGate – Microgreens: Assessment Of Nutrient Concentrations
- Wikipedia – Vermiculite
- Cambridge University – Environmental Factors Influencing The Growth And Pathogenicity Of Microgreens Bound For The Market: A Review
- Harvard University – Hydroponics: The Power Of Water To Grow Food
- Oklahoma State University, Extension – Aquaponics
Related posts:
 Do Microgreens Regrow After Cutting
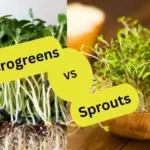 Microgreens vs Sprouts (uncover the differences and get growing)
 Choosing The Best Soil For Microgreens (the secret to success)
 How To Water Microgreens (your in-depth guide)
 Microgreen Lights And The Importance Of Light Spectrum For Growing Nutritious Microgreens
 Growing Microgreens Outdoors (the joy of microgreens in your backyard)
